
Simple and clean stamping is really in right now and this project takes that concept on in a big way. So here is the Very Vintage Hostess stamp set I used, isn't it beautiful?
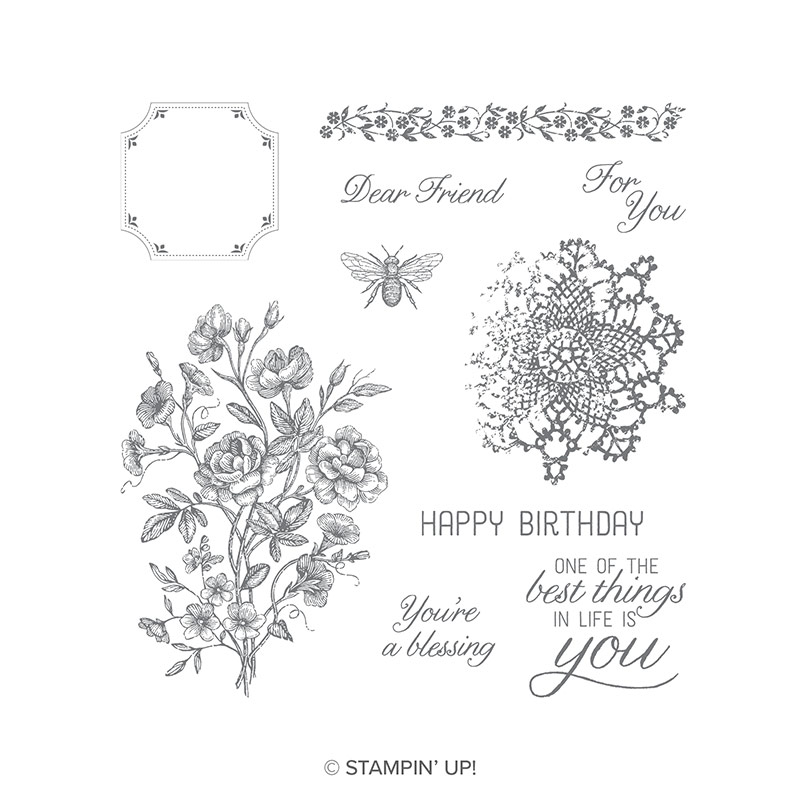
I have used this set on a few other projects and I really love it. So lets get to it and talk about how this card was created. I started with some whisper white card stock and rich razzleberry ink and I just randomly stamped the flowers all over the paper. I then cut that into strips that were 2 x 5" and mounted them onto strips of rich razzleberry card stock that was 2 1/4 x 5 1/4". I die cut a piece of whisper white using the largest oval from the stitched shapes dies and stamped the sentiment (I used one from another stamp set but there are some really adorable sentiments in this set as well) and the flowers using rich razzleberry ink. I then die cut a piece of the rich razzleberry card stock using the largest of the scalloped ovals from the layering ovals framelits and layered the white oval on top of it.
To assemble the card I cut the card base from whisper white card stock to 8 1/2 x 5 1/2" and scored at 4 1/4". I placed the 2 1/4" wide strip on the left side of the paper directly onto the card base. I then used some dimensionals and popped up the oval on the center of the card to the right. I am pretty happy with how it turned out and the best part is it can be reproduced using colors you want. All it takes is a little paper a stamp set and one color of ink, sure doesn't get any easier than that.
I will list all the supplies below and they can all be purchased from my website at www.craftwithronnie.stampinup.net or by clicking the shopping button at the top of this blog. As always, Happy Crafting!!!
Supplies:
Cardstock: Whisper White (100730) and Rich Razzleberry (115316)
Ink: Rich Razzleberry (147091)
Stamps: Very Vintage (146801) and Wonderful Romance (146801)
Dies: Stitched Shapes (145372) and Layering Ovals (141706)
Misc: Dimensionals ( 104430) and adhesive of choice


No comments:
Post a Comment