Featured Post

FUN WITH TEMPLATES

Today’s card features the Fern & Flora Bundle and the Moonlit Flora Designer Series Paper.  I fell in love with this suite the first tim...

Tuesday, October 21, 2014

Christmas Continues

I am trying hard to stay focused and post here often, not always good about it but I am trying hard to do at least one project a day so I can be ready for the holidays well in advance this year.  So this card is a little different than my normal posts in that I used products other than mainly Close to my Heart. While I do love the CTMH products sometimes there are other brands that do catch my eye and I am trying to get better about using things instead of just looking at them in my craft room, so here goes.


I did use CTMH paper because I love the weight and feel of it and it embosses so beautifully.  The Happy Holidays sentiment is theirs as well.  So here is how I made this one.  I hope you will try it, it was not too hard and it ended up looking very regal and perfect for the holidays.  The card base and envelopes, cardstock, ink and stamp set can be purchased from my website at www.craftwithronnie.ctmh.com or by clicking on the shopping cart at the top of this blog.  I hope this inspires you to look around your craft room and make a card.  Happy Crafting.  

White Card base and envelope (X254) 

Ruby Cardstock (x5927) cut to 4 ¼ x 5 ½” (I build the card on this before attaching to the base to hide the back of the brad, etc.)

Daisy White Cardstock (1385) cut to 4 ¼ x 4” (cut three)

Anna Griffin snowfall embossing folder (I could not resist them on the HSN craft day)

Red Ribbon (from my stash, I wrapped it around the card front and tied the bow and added the pearl brad before I attached it to the card base)

Pearl Brad (from my stash)

Black Ink (Z2105) for sentiment

Clear Assortment Sparkles (Z1752)

Happy Holidays sentiment from Perfect Fit stamp set (B1412)

Snowflake – recollections punch

Monday, October 20, 2014

Another Yuletide Carol Card


As I have said before I hate to waste my paper packs so here is another Christmas card made with one of the other background and texture (B&T) papers from the Yuletide Carol Paper pack (remember that is the same one I used for the card in my last post).  This card was inspired by one I saw on Pinterest which was created by Darlene Ripley.  I relied heavily on my Close to my Heart cricut cartridges for this card.  I love these cartridges (I have all four) because they are so flexible, over 700 images on each one and tons of great projects and pretty much the only cartridges I ever use.  But I digress, here we go...


Here is everything you need to make this card.  You can purchase the supplies on my website at www.craftwithronnie.ctmh.com or by clicking on the shopping cart at the top of this blog.  Hope you enjoy this project.  Happy Crafting!!


Colonial White card base and envelope (X1410)

Ruby Cardstock (X5927), cut to 4 ¼ x 5 ½”,  1 x 4”, Poinsettia is from Artiste cartridge, page 80, cut 2”, 1 ¾” and 1”

Topiary Cardstock (X5635), cut from Art Philosophy cartridge  page 46 at 2 ¼ and 1 ¾”

Yuletide Carol Paper Pack (X7178B) use B&T with notes cut at 4 x 5 ¼” and B&T with swirls for strip cut to 1 x 5 1/4”

Colonial White cardstock (1388) cut to ¾ x 3 ¾” for sentiment

Ink – Topiary (Z2155) for sentiment and for leaves and Ruby (Z2170) to dauber edges of flower

Silver Shimmer Trim (Z1799)

Clear Assortment Sparkles (Z1752)


A Holiday stamp set (A1115)

Daubers (Z726), these are my secret weapon, I use them all the time to give things depth and more interest

Liquid Glass (Z679) or adhesive of your choice to put together flower and attach to card (my hubby calls this stuff my liquid duct tape because I use it on everything, LOL).

Artiste Cricut Cartridge (Z1790)

Art Philosophy Cricut Cartridge (Z1686)

Sunday, October 19, 2014

A little change can be a good thing

As you can tell from my posts I love to make cards.  I also love Close to my Heart and their products, hence the reason I am a consultant.  However, every now and then we all need a break from what we do for a living (even if we love it and don't always think of it as a job).  So I decided to attend a workshop at a friends home (she works as a demonstrator for another company) and I had a blast.  It was nice to use some new products and even nicer to let her do the work of designing the cards and teaching me (for a change I got to sit back and just craft away without any responsibility).  So here are some of the cards I created during her workshop.  I love them.  


What a great time, looking forward to doing it again soon.  As always, Happy Crafting!!

Yuletide Carol Paper Pack

Today I am making a card that uses a stamp set I have used over and over to make cards year round.  I find this particular stamp set very versatile, it is called Always Grateful.

I wanted something different from the traditional Christmas tree look for my card and I hope I achieved it with this choice.  Here is the finished card:


And here is the recipe I used to make it.  I did use one item on this card that was not a Close to my Heart product and that was the swiss dot embossing folder.  I really wanted the feel of snow falling and the CTMH Dot embossing folders dots were just too big for that affect.  I should also note that I stamped the center tree and then for the two trees to the sides I stamped off the cardstock onto scrap paper and then stamped onto the cardstock.  Again today I worked to use my background and texture (B&T) paper in the most efficent way possible.  All the products listed below can be purchased from my website (except the swiss dot embossing folder) at www.craftwithronnie.ctmh.com or by clicking on the shopping cart at the top of this blog.  Happy Crafting!!!


Colonial White card base and envelope (X1410)

Always Grateful stamp set (C1559)

Yuletide Carol Paper Packet (X7187B)
4 x 5 ¼” and 4 ½ x 3 ¼”

Colonial White cardstock (1388)
Circle 2 ¾” from Artiste page 48

Cranberry cardstock (Z2116)
4 ¼ x 1”, 5 ½ x 4 ¼”, 3 ½ x 4 ¾” and a 3 ¼” circle from Artiste page 48

Winter Wishes sentiment from To You and Yours (B1403)

Red/White Bakers Twine (Z1861) this is part of the Ruby Mini-Medley Accent Collection

Swiss Dot embossing folder (Cricut cuttlebug)

Ink – Chocolate (Z2111)

Artiste Cricut Cartridge (Z1790)
 

Saturday, October 18, 2014

Snowhaven Fun

We made a card similar to this during convention this year but I wanted to tweak it so it used the background and texture (B&T) paper to it's best advantage and I didn't waste any (I try to plan my cards to get the most out of my 12 x 12 papers).


So here is my recipe for this beautiful card.  I would also like to point out you can make over 6 of these beautiful cards (with tons of paper left over for other projects) out of one paper pack.  Love it when I can do that!!  All the supplies to make this card can be found on my website at www.craftwithronnie.ctmh.com or by clicking on the shopping cart at the top of this blog.  Happy Crafting!!!

White Card base and envelope (X254)

Snowhaven Paper Packet (X7188) - I used one one of the three B&T papers
¾ x 4 ¼ ” and 4 x 5 ¼ ”

Glacier cardstock (included in Snowhaven Paper Pack)
4 ¼ x 3 ¼” and 1 x 4 ¼”

Cranberry cardstock (included in Snowhaven Paper Pack)
4 x 3”

Daisy White cardstock (included in Snowhaven Paper Pack)
2 1/2 x 2 1/2"

Best Christmas stamp set (D1613) – sentiment in black and snowflakes in glacier

Bitty Sparkles (Z1263)


Ink – Black (Z2105) and Glacier (Z2641)

Corner rounder (Z1912)

Wednesday, October 15, 2014

Christmas Break

I decided I needed a little break from Christmas cards today so I wanted something fun, colorful and spring like.  What better than a beautiful flower card?  I just love this stamp it is called Quick Cards - Japanese Blossom.  Close to my Heart has a whole series of these simple inexpensive single stamps that are just $6.95 each.  I think I am going to pull all mine out next week and play around with making some cute card sets to give as Christmas gifts.  So here is the card...


And here is the recipe to make it.  You can find these supplies on my website at www.craftwithronnie.ctmh.com or by clicking on the shopping cart at the top of this blog.  Happy Crafting!!!


White card base and envelope (X254)

Quick Cards – Japanese Blossom (A1155)

Memento Tuxedo Black ink (because it doesn't bleed when I use my markers

Misc. markers or color pencils (I used my Spectrum Noir's) 

Daisy White cardstock (1385) cut to 4 x 5 ¼” and 2 ¾ x 2 ¾”

Thistle cardstock (X5769) cut to 3 x 3”

Seaside B&T (X7192B) cut to 3 ½ x 4”

Kraft cardstock (Z1375) cut to 4 ¼ x 5 ½”

Thistle Diagonal Striped Ribbon (Z1990)

Thistle Ink (Z2640)

Monday, October 13, 2014

Getting in the Holiday Spirt


My mother-in-law just loves Cardinals and this card was so quick and easy.  I started with the To You and Yours stamp set, I ordered it because I loved the cardinal but also because it had some great holly leaves and berries and some cute sentiments.


Next I selected my paper colors, I decided on Ruby and Olive.  Add some white and you have some great holiday colors.  I stamped the cardinal on a piece of White Daisy cardstock that was cut to 3 x 3" using Black Memento ink (because I wanted to color in the image with my markers and it doesn't bleed).  I used several of my Spectrum Noir markers (whatever markers are your favorite is fine) and began blending the colors.  When I was finished I mounted that piece onto a piece of Ruby cardstock that measured 3 1/4 x 3 1/4" and that was then mounted onto a piece of Olive cardstock that measured 3 1/2 x 3 1/2".  Next I took a piece of the Daisy White cardstock that measured 1 3/4 x 5" and ran it through the Damask embossing folder.  The entire project was then mounted onto a card base made from a piece of Ruby cardstock that measured 5 1/2 x 8 1/2" folded to make a 4 1/4 x 5 1/2" card.   


For the inside of the card I used a piece of white bond paper that measured 4 x 5 1/4, stamped the holy leaves and berries in the bottom left corner (did the same on the envelope) and colored them in using my markers.  Finally, I stamped the Love and joy to you and yours sentiment from the stamp set with Ruby ink.  I am very happy with the results and it really was quite easy.  All the supplies to make this card can be purchased from my website at www.craftwithronnie.ctmh.com or by clicking on the shopping cart at the top of this blog.  Happy Crafting!!!

Supplies Used:

Stamp set "To You and Yours" (B1403)
Damask Embossing Folder (Z1927)
Ruby Ink (Z2170)
Ruby cardstock (X5927)
Olive cardstock (1245)
White Daisy cardstock (1385)


Sunday, October 5, 2014

Flakey Friends

Well another day at 100 degrees, but I still managed to find the necessary inspiration to make another Christmas Card.  This one was inspired by one I saw on Pinterest which was made by Allisa Chilton.  I did take the liberty of changing somethings around and making it my own.  I have to say I love the three adorable little snowmen in this stamp set.


I used my Artiste Cartridge to make all the circle cuts (made it so easy).  I started with black cardstock which I cut to 5 1/2 x 8 1/2" and folded to make an A2 card (4 1/4 x 5 1/2").  I then cut Indian Corn Blue (isn't it an amazing blue) to 4 x 5 1/4" and ran it through my Cuttlebug using a swiss dot embossing folder.  Next I cut two black circles, one at 3 1/2" and one a 2 1/4", two Indian Corn Blue circles, one at 3 1/4" and one a 2", and finally two Daisy White Circles at 3" and 1 3/4" all using the circle on page 48 of the Artiste Cartridge (love all the things I can cut with this cartridge, over 700 images and tons of 3-D items).  I then stamped the smallest Daisy White circle with the snowflakes from the Flakey Friends stamp set using Indian Corn Blue Ink.  I cut 1/2" off each of the three large circles and then stamped the cute snowman.  I don't have the new Shin Han markers from Close to my Heart yet (the ladies are all raving about how great they work) but I do have my trusty Spectrum Noirs so I used OR 1 for the nose, EB5 for the arms and BT9 for the scarf and hat.  I added Clear Assortment Sparkles because you have to have bling.  An finally some white ribbon from my stash and there you have it.  I am very happy with the results.  A list of all the Close to my Heart supplies used is provided below and can be purchased from my website at www.craftwithronnie.ctmh,com or by clicking the shopping cart at the top of this blog.  Happy Crafting!!!

Supplies Used:

Cardstock: Indian Corn Blue (1284), Black (1386), Daisy White (1385)
Ink:  Indian Corn Blue (Z2130) and Memento Black
Stamp:  Flakey Friends (C1506)
Clear Assortment Sparkles (Z1752)
Artiste Cricut Cartridge (Z1790)


Friday, October 3, 2014

Snowhaven Christmas Card Workshop on the Go

Ok so I made some more cards today to sell at a craft fair and through my blog.  Again sets of one each of five cards.  These were created by using the Snowhaven Card Workshop on the Go.  It included the paper, the hearts and the stamps I need for three of the cards and then the other two were created with the leftover paper and a few other stamp sets I have in my stash.

Here are all the cards grouped together:


And here they are individually (the first three are the ones created from the kit:


The following card was created using left over paper and the snowflake stamps from the Best Christmas stamp set and the Snowman is from Flakey Friends.


This next card was made with leftover paper and the Best Christmas stamp.


All the supplies you need to create these cards can be found on my website at www.craftwithronnie.ctmh.com or by clicking the shopping cart at the top of this blog.  I hope you  enjoyed and Happy Crafting!!!!


Thursday, October 2, 2014

Christmas Cards

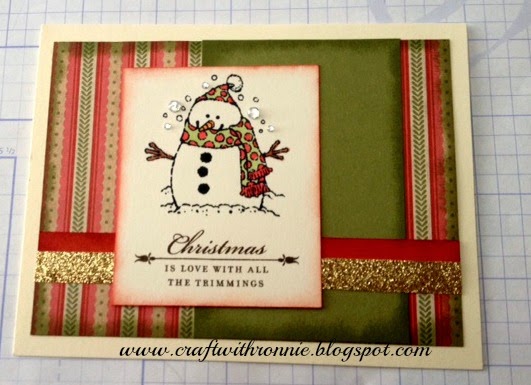
I has been hard to get in the spirit of making Christmas cards this week since it has been in the 80's and 90's here on the central coast of California but I did get some done.  Here is a look at a set of cards I prepared for sale at a local craft show using a retired card workshop and some bits and pieces from my stash.  I made a set of 5 different cards and I am pretty happy with how they turned out (got six sets finished so far).


Here they are all together and now here they are one by one: