Featured Post

FUN WITH TEMPLATES

Today’s card features the Fern & Flora Bundle and the Moonlit Flora Designer Series Paper.  I fell in love with this suite the first tim...

Monday, March 6, 2023

6 x 6” One Sheet Wonder #2 (3-6-23)

Today I wanted to share three more cards I made using the template I shared last Thursday for cutting your Designer Series Paper.  I used the Fancy Flora DSP again today just choosing a different piece of the paper, this time one that was more in the orange tones.  I chose to use the beautiful Brushstrokes 12 x 12” Specialty Paper (I used the Soft Succulent colored piece) on all the cards.  This beautiful paper is thin like vellum but has an amazing brushed affect like a beautiful painting. 

So lets get started, in case you missed yesterdays post will will first we need to cut our Designer Series Paper and the template for that is below:


CARD 1 (uses the 2 x 5 ¼” piece of DSP)  

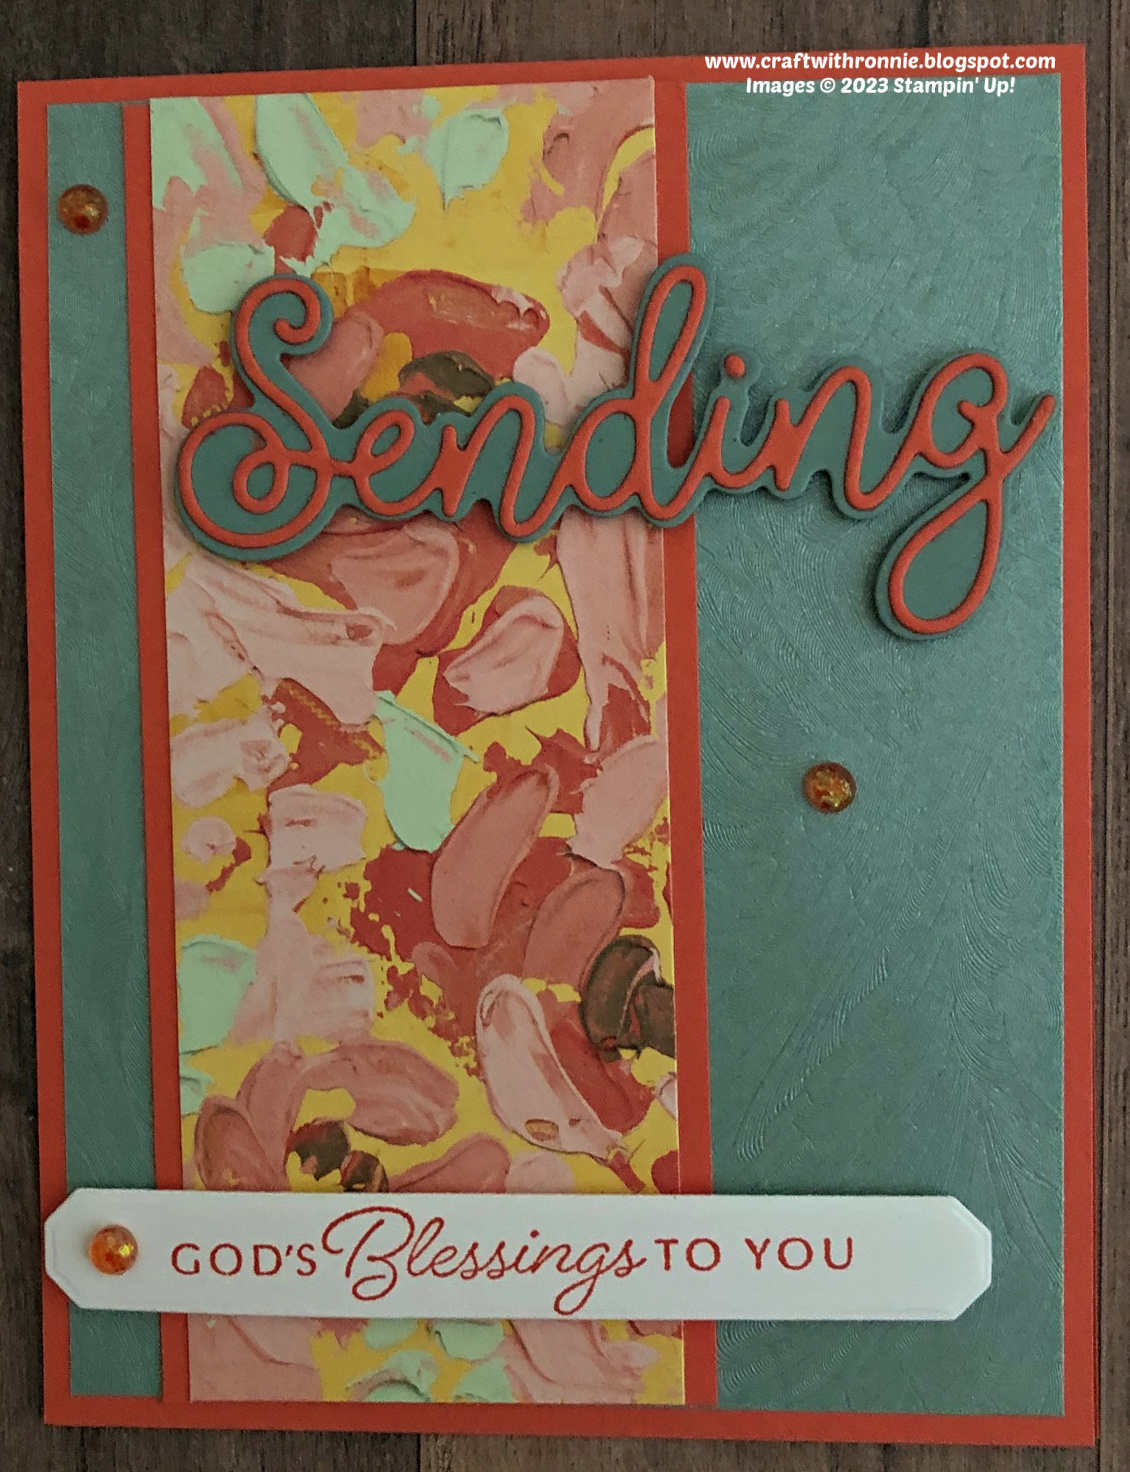
The card base is Calypso Coral cardstock cut to 4 ¼ x 11” and scored at 5 ½”.  I then cut a piece of the Brushstrokes 12 x 12” Specialty Paper to 4 x 5 ¼” and adhered it to the card base (NOTE:  like vellum because this paper is so thin and fine it is best to add the adhesive with a sponge so you don’t distort it).  Next, I cut a piece of Calypso Coral cardstock to 2 ¼ x 5 ¼” and layered my Designer Series Paper onto it.  I added this piece about ¼” in on the Brushstroke paper on the left side.  I stamped my sentiment “GOD’S Blessings TO YOU” from the Hope & Peace Stamp Set onto a piece of Basic White cardstock with Calypso Coral Ink, that measured about ½ x 4” and I die cut it using a die from the Harvest Dies (remember if you don’t have a die you can simply cut a rectangle and stamp on it).  I then die cut the two layers of the word Sending from the Sending Dies, the shadow layer was cut from Soft Succulent cardstock and the top layer was cut from Calypso Coral cardstock.  I mounted the “Sending” centered near the top of the card and the sentiment near the bottom left of the card, popping each of them up with Dimensionals.  For my final embellishment I added three of the Opal Rounds that I had colored with the Dark Calypso Coral Stampin’ Blend Marker (remember you can use these markers to make your own coordinating embellishments from lots of the plain embellishments offered by Stampin’ Up!  

CARD 2 (uses one of the 3 x 4” pieces of DSP)

The card base is Calypso Coral cardstock cut to 4 ¼ x 11” and scored at 5 ½” (just to add some interest).  I again cut a piece of the Brushstrokes 12 x 12” Specialty Paper cut to 4 x 5 ¼” and attached it to my card base.  I stamped my sentiment “Hello THERE” from the Nature’s Print Stamp Set onto the Designer Series Paper using Calypso Coral Ink.  I then mounted the Designer Series Paper to a piece of Calypso Coral cardstock that measured 3 ¼ x 4 ¼” and wrapped a piece of the Soft Succulent Open Weave Ribbon around it and tied a square knot.  Then I mounted that onto the center of the card base using Dimensionals.  For my final embellishment on this card, I added three of the Opal Rounds that I had colored with the Dark Soft Succulent Stampin’ Blend Marker.     

CARD 3 (uses the second of the 3 x 4” pieces of DSP).

The card base is Petal Pink cardstock cut to 5 ½ x 8 ½” and scored at 5 ½”.  I again cut a piece of Brushstrokes 12 x 12” Specialty Paper to 4 x 5 ¼” and attached it to the card base.  I then took my last piece of Designer Series Paper and attached it to a piece of Calypso Coral cardstock that measured 3 ¼ x 4 ¼”.  I wrapped a piece o the beautiful Soft Succulent Shimmer Ribbon around this piece and tied a square knot and mounted that onto the center of the card base using Dimensionals.  I did not add a sentiment or embellishments to this card.  I often wait to do this until I need a card and then I can customize it to my needs by adding an appropriate sentiment and/or additional embellishments.

I hope you enjoy these cards I certainly creating them and using this great template for a 6 x 6” One Sheet Wonder and you can be sure you will be seeing some more of these.  I do want to remind everyone that you don't need to be overwhelmed by the list of products here.  I used all of these because I had them on hand.  One set of stamps for sentiments would have been fine.  I could have limited the colors I used and could have chosen to simply use the opal rounds as they were instead of coloring them with the Stampin' Blends.  The idea is to think outside the box and see what YOU come up with.  As always you can find the supplies to create these cards and much more on my website at https://craftwithronnie.stampinup.net or by click the shopping button at the top of this blog or the link to the supplies listed below.

Happy Crafting!!!

Product List

Sunday, March 5, 2023

Definitely Irresistible

Today’s card was created using the new Irresistible Blooms Bundle and the Hello, Irresistible Designer Series Paper.  First I want to say all the products in this collection are beautiful but you won’t be seeing them in a catalog because they are part of the new Stampin’ Up Online Exclusives.  That’s right, these and more products have been introduced as online exclusives and will be available for a limited time.  I was dying to play with this set and my first card was inspired by a card I saw posted on facebook that was created by Terri Gaines while I was waiting for my products to arrive (yep, like so many things they were delayed by the horrible winter storms happening across the county). 

Here is what I came up with…


The card base is Basic White cardstock cut to 5 ½ x 8 1/2” and scored at 4 ¼”.  I then cut a piece of the Designer Series Paper to 2 x 5 ¼” and mounted it on to a piece of Flirty Flamingo cardstock that measured 2 1/8 x 5 3/8” and added that to the left side of my card base.  I die cut two of the Taylor Made Tags Dies (one in Basic White and one in Flirty Flamingo).  I stamped my sentiment “hello” from the bundle onto the white tag using Flirty Flamingo Ink.  Then I ran the area above the sentiment through one of the Basic 3D Embossing Folders just to give it a little extra interest.  I tied a bow made from the Whisper White Crinkled Seam Binding Ribbon through the top of the two tags and attached it to the front of my card.

Now for the decorating.  I decided to have some real fun with this card so I took some Basic White cardstock and colored all over it with Petal Pink, Flirty Flamingo and Daffodil Delight inks using the Blending Brushes.  I love this affect for these types of projects.  I then stamped the flowers onto the paper I had colored using VersaMark Ink and heat embossed them with White Stampin’ Emboss Powder.  I also stamped one of the sets of leaves from the bundle onto a scrap of Daffodil Delight cardstock using VersaMark Ink and heat embossed it with the White Stampin’ Emboss Powder.  I die cut all those pieces out along with three sets of leaves from the Designer Series Paper (yes that is right, there are 2 sheets of flowers and 2 sheets of leaves that can be die cut using the dies in the bundle) and one single leaf cut from a scrap of Basic White cardstock.  Once everything was cut out I just started laying it out until I got the look I wanted and then I adhered everything using Dimensionals or adhesive.  For my final addition I did add five of the new Loose Frosted Dots (just a note these sold out quickly so they are currently unavailable but more have been ordered and they will be back in stock soon). 

I hope you enjoy this card I certainly enjoyed making it.  As always you can find the supplies to create this card and much more on my website at https://craftwithronnie.stampinup.net or by click the shopping button at the top of this blog or the link to the supplies listed below.

Happy Crafting!!!

Product List

Thursday, March 2, 2023

6 x 6” One Sheet Wonder #1

Today I wanted to share a template for some great one sheet wonder cards.  Think about it, 3 cards from one 6 x 6” sheet of Designer Series Paper (or if you are using 12 x 12” DSP that would be 12 cards out of one sheet).  I love it when I can find a way to make beautiful Designer Series Paper go farther and this layout works great for that.  I will be sharing several more sets of cards I made using the beautiful Fancy Flora DSP over the next week or so. 

First we need to cut our Designer Series Paper and the template for that is below:

I want to point out that on these cards I used only one stamp set but three different embossing folders.  I also used several different colors of cardstock.  The truth is that these cards could all have the same color cardstock and the same embossing folder.  It is important that you remember you don’t have to have it all to get started.  Hope you enjoy these.

CARD 1 (uses the 2 x 5 ¼” piece of DSP)  

The card base is Petal Pink cardstock cut to 5 ½ x 8 1/2” and scored at 4 ¼”.  I then cut a piece of Mint Macaron cardstock cut to 4 x 5 ¼” and embossed with the Pretty Flowers Embossing Folder (I will be making three cards each with a different embossing folder, embossing folders are a pretty inexpensive way to class up your cardmaking) and attached it to my card base.  Next, I cut a piece of Starry Sky cardstock to 2 ¼ x 5 ¼” and layered my Designer Series Paper onto it.  I added this piece about ¼” in on the embossed layer on the left side.  I stamped my sentiment “A Little Hello From Me To You” (from the Pansy Patch stamp set, which is the stamp set I used on all three cards) onto a piece of Mint Macaron cardstock that measured ½ x  3 ½”  using Starry Sky Ink.  I added that to a piece of Starry Sky cardstock that measures ¾ x 3 ½” and then just cut the right side at an angle for interest.  I added this to the center of my card using Dimensionals.  For my final embellishment I added three of the Brushed Brass Butterflies.  

CARD 2 (uses one of the 3 x 4” pieces of DSP)


The card base is Starry Sky cardstock cut to 4 ¼ x 11” and scored at 5 ½” (just to add some interest).  I again cut a piece of Mint Macaron cardstock cut to 4 x 5 ¼” and this time I embossed with the Cane Weave 3D Embossing Folder and attached it to my card base.  I stamped my sentiment “Wishing you a little extra happiness just because you are you” (again from the Pansy Patch stamp set) onto the front of my Designer Series Paper using Starry Sky Ink.  I mounted this onto a piece of Starry Sky cardstock that measured 3 ¼ x 4 ¼” and mounted that onto the center of the card base using Dimensionals.  For my final embellishment on this card, I added five of the Festive Pearls.  

CARD 3 (uses the second of the 3 x 4” pieces of DSP).

The card base is Calypso Coral cardstock cut to 5 ½ x 8 ½” and scored at 5 ½”.  I again cut a piece of Mint Macaron cardstock cut to 4 x 5 ¼” and this time I embossed with the Quatrefoil Tile Embossing Folder and attached it to my card base.  I stamped my sentiment “Happy Birthday” (also from the Pansy Patch stamp set) onto the front of the Designer Series Paper using Starry Sky Ink.  I mounted this onto a piece of Starry Sky cardstock that measured 3 ¼ x 4 ¼” and mounted that onto the center of the card base using Dimensionals.  For my final embellishment on this card, I added one of the Dragonfly Trinkets. 

I hope you enjoy these cards I certainly creating them and using this great template for a 6 x 6” One Sheet Wonder and you can be sure you will be seeing some more of these.  As always you can find the supplies to create these cards and much more on my website at https://craftwithronnie.stampinup.net or by click the shopping button at the top of this blog or the link to the supplies listed below.

Happy Crafting!!!

Product List