Featured Post

FUN WITH TEMPLATES

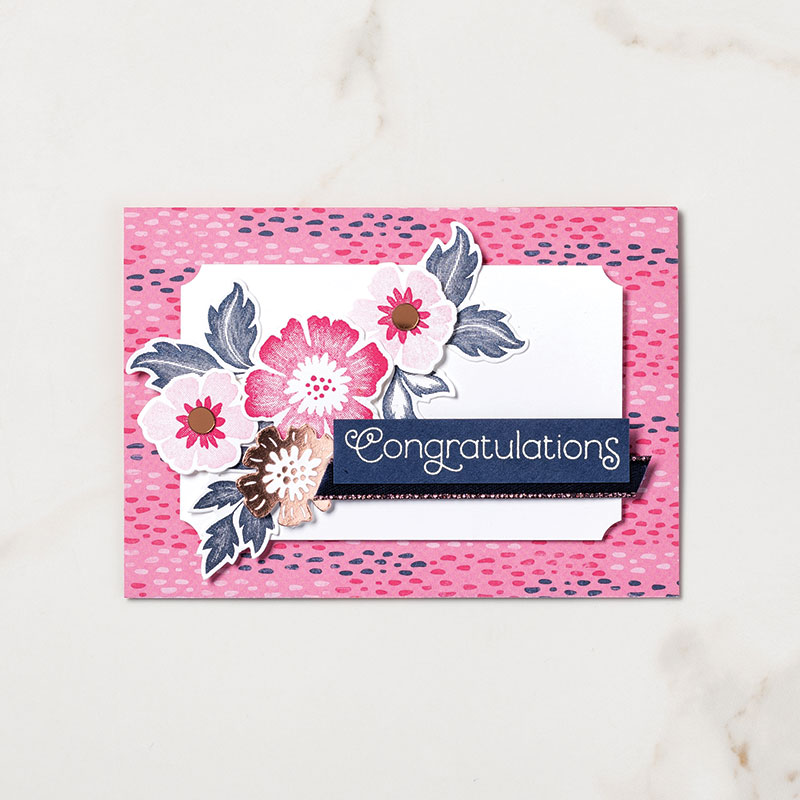
Today’s card features the Fern & Flora Bundle and the Moonlit Flora Designer Series Paper.  I fell in love with this suite the first tim...

Monday, May 27, 2019

New Catalog Launch - June 4th

I have been having a blast playing around with the new products.  Be sure to check out my website at www.craftwithronnie.stampinup.net on June 4th to check out and order all the beautiful new products you just can't live without.  Here are just a few of the things I have been working on: 

These are from the new Daisy Lane Bundle:


These are from the Sailing Home Bundle:


Keep your eyes out for lots of new and exciting projects because this new catalog is packed full of some really awesome products.  As always, Happy Crafting!!!

Wednesday, May 8, 2019

A little more Everything is Rosy!!!

So yesterday I promised another post with a few more beautiful projects that were made using the Everything is Rosy medley so here they are:


And a reminder of what is in the kit:


The Everything Is Rosy Product Medley (Item Number: 150059) includes these exclusive products:
  • Everything Is Rosy Photopolymer Stamp Set—18 stamps; suggested blocks: a, b, c,
  • Everything Is Rosy Dies—10 dies; largest die 2-7/8" x 1" (7.3 x 2.5 cm)
  • 6" x 6" (15.2 x 15.2 CM) Designer Series Paper Stack—48 sheets; 8 each of 6 double-sided designs
  • 6" x 6" (15.2 x 15.2 CM) rose gold foil paper—8 sheets
  • Printed die cuts—2 sheets
  • Rose gold die cuts—4 sheets; 2 each of 2 designs
  • Rose gold adhesive backed mirror embellishments—60 embellishments; 1/4" (6.4 mm)
  • Melon Mambo 1/4" (6.4 mm) Ruched Ribbon—10 yards (9.1 m)
  • Night of Navy/Rose Gold 3/8" (1 cm) Metallic –Edge Ribbon—10 yards (9.1 m)
  • Rose Gold Shimmer Paint—1/2 oz. (15 ml)
    
  So don't miss out, remember this offer ends on May 31st or when supplies run out don't wait, head over to my webpage at www.craftwithronnie.stampinup.net or click on the shopping button at the top of this blog to get your medley before they are gone.  As always, Happy Crafting!!!

Tuesday, May 7, 2019

Everything is Rosy!!!


SPRING IS IN THE AIR
Meet the newest member to our Stampin' Up! product medley kits: Everything Is Rosy! Right in time for spring, the Everything Is Rosy kit is a bundle of coordinating products so you only need one item number to purchase everything you need! That will make it easy for you order. With gorgeous pops of rose gold, this kit will be a hot and trendy way to bring in spring! Let your creativity run rampant with no specifically set project so the possibilities are endless, and (hint, hint) you can order it now! Don't miss out, this is only available for a limited time and while supplies last. So spread the sunshine, and get ready for spring with the Everything Is Rosy Product Medley!


This medley is packed with a ton of amazing products (see the list below) and you can create some beautiful items with it, just look at these gorgeous projects (I will post a few more pics of projects using this amazing medley tomorrow as well):


The Everything Is Rosy Product Medley (Item Number 150059) includes these exclusive products:
  • Everything Is Rosy Photopolymer Stamp Set—18 stamps; suggested blocks: a, b, c,
  • Everything Is Rosy Dies—10 dies; largest die 2-7/8" x 1" (7.3 x 2.5 cm)
  • 6" x 6" (15.2 x 15.2 CM) Designer Series Paper Stack—48 sheets; 8 each of 6 double-sided designs
  • 6" x 6" (15.2 x 15.2 CM) rose gold foil paper—8 sheets
  • Printed die cuts—2 sheets
  • Rose gold die cuts—4 sheets; 2 each of 2 designs
  • Rose gold adhesive backed mirror embellishments—60 embellishments; 1/4" (6.4 mm)
  • Melon Mambo 1/4" (6.4 mm) Ruched Ribbon—10 yards (9.1 m)
  • Night of Navy/Rose Gold 3/8" (1 cm) Metallic –Edge Ribbon—10 yards (9.1 m)
  • Rose Gold Shimmer Paint—1/2 oz. (15 ml)

  So don't miss out on the Everything Is Rosy Product Medley!  This medley is going to go fast so head over to my website at www.craftwithronnie.stampinup.net or click on the shopping button at the top of this page to get yours ordered right away.  As always, Happy Crafting!!!

Sunday, May 5, 2019

Inspiration comes in the strangest places

So I have been missing in action for the past week as I made a trip to the Biltmore in Ashville, North Carolina.  Oh what a magnificent house but the best part and the most inspiring was the beautiful gardens and conservatory.  There were varieties of flowers there I had never seen in person.  So when I returned home and was looking at the beautiful Paper Pumpkin kit for April I was even more inspired. 

So here is what the kit looks like (it included products to make 9 cards, 3 of each designs along with the matching envelopes and a beautiful gift box that holds all of them) but remember there were some extra products in there and an ink spot and a beautiful stamp set that can be used over and over.


So I decided to combine the stamp set along with a few other products and make some more cards, this is just a small sampling of what I created.


Here are a couple of them up close.  I decided to use a couple different ideas, some embossing folders, some DSP but they were all done on watercolor paper using the aqua brushes and inks.  I really love the affect I got with the watercolor paper.  


Don't know what the paper pumpkin is all about?  It is an amazing hastle free monthly crafting subsciption.  You receive everything you need to make amazing, easy products including an exclusive stamp set.  Just choose a subscription plan and get started.  Subscriptions are available in 1 month, 3 months, 6 months and 12 month plans.  You must subscribe by the 10th of the month to receive that months kit.  Well let me just tell you the new May kit is really something, we got a taste of it during last months On Stage event and I can't wait to recieve mine.  


Here is the card we made from the kit, wouldn't you love to have these...


Check it out on my webpage at www.craftwithronnie.stampinup.net or by clicking the shopping button at the top of this post.    I hope you enjoyed my introduction to Paper Pumpkin, and as always, Happy Crafting!!!


Saturday, May 4, 2019

Don't Miss This

This May, you’re in for a treat. Paper Pumpkin has teamed up with Shelli Gardner, Stampin’ Up!’s board chair and cofounder, to deliver you a very special Paper Pumpkin kit. It’s exclusive, collectible, and one of a kind. Die-hard Paper Pumpkin and Stampin’ Up! fans won’t want to miss this special edition.


The look and feel of this kit is all Shelli. It’s elegant, feminine, and so full of springtime details that you’ll probably just want to take a walk, breathe in the fresh air, and then go home and stamp every card in the kit. And the box it comes in? We predict that you’ll be keeping it . . . like . . . forever. Wait and see.


Tuesday, April 30, 2019

Revisiting the Artistically Asian Stamp Set

So I am going to revisit the Artistically Asian stamp set but this time I am mixing it in with some items that are not retiring.  I have to credit Carol Ann Pendleton for this idea, I saw a card she had made on pinterest that inspired me to give this one a try.  I hope you like it:


Here is the stamp set, it really has some nice stuff on it!


I started with my standard card base of whisper white (4 1/4 x 11" scored at 5 1/2').  I added a layer of blushing bride ( 4 x 5 1/4").  Then I took two pieces of whisper white that measured 2 x 3" and stamped them in blushing bride using the Bokeh Dots stamp set (I love this bokeh affect on cards, it makes some beautiful backgrounds).  Next I stamped the images twice on each piece with Melon Mambo and once with Versa Mark and used gold embossing powder on that third image.  I mounted those onto pieces of whisper white that were 2 1/4 x 3 1/4.  

I then mounted these two image pieces at angles for interest onto the blushing bride layer and wrapped them in whisper white sheer ribbon and tied a bow.  I stamped the sentiment using Melon Mambo ink and cut it out using the stitched shapes dies and a second piece was cut out of the blushing bride using one of the dies from the layered ovals.  I popped that up with dimensionals and added three leaves in pear pizzaz that I cut out of the Rose Trellis die set and inked with just a touch of the pear pizzaz ink.  

This card could be made with lots of cute changes, a different sentiment, a different ribbon, a simple embossing folder could really pop the blushing bride layer.  Of course it would be great in lots of colors, I was thinking it would be great in blushing bride and gray granite.  The options are endless.  I hope you enjoy this card.  I will list all the supplies at the bottom of this post and they can all be purchased on my website at www.craftwithronnie.stampinup.net or by clicking the shopping button at the top of this blog.  As always, Happy Crafting!!!

Supplies Used:
Stamp Sets: Artistically Asian (141781 / Retiring June 3), Bokeh Dots (148113)
Dies:  Rose Trellis (148549 / Retiring June 3), Layering Ovals (141706), Stitched Shapes (145372)
Inks: Blushing Bride (131172), Melon Mambo (126948), Pear Pizzaz (131180), VersaMark (102283)
Cardstock: Whisper White (100730), Blushing Bride (131189)
Miscellaneous: Whisper White Sheer Ribbon (144172), Dimensionals (104430), Gold Embossing Powder (109129)

Monday, April 29, 2019

Simple Stamping with Artistically Asian

Ok, so I have to admit I have had this set for a long time and have not even begun to use it to its potential and now it is retiring in June.  So here we go with a couple cards using the Artistically Asian stamp set (I have used this one numerous times for sympathy cards because of its simple clean look).  Here is the first card I created using this set:


I began with a black card base (something I don't often do but each time I do I wonder why I don't use more black in my cards because it really sets off the other colors).  My base is 4 1/4 x 11" scored at 5 1/2" to make an A-2 card.  I then added this beautiful designers series paper called Petal Promenade, while the one side is bright busy flowers I loved the simple clean look of grays and pinks in a marbled affect for this card (this piece is 4 x 5 1/4").  I then pulled out my trusty dies and die cut two squares using the stitched shapes dies one in black and one in petal pink.  I then stamped the image using smoky slate ink (love how it pulled the gray out of the designer series paper).  I also cut two rectangles using the rectangle stitched dies (one from black and one from whisper white), I stamped my sentiment on the white piece with Memento ink.  I off set the pieces and then popped both with dimensionals.  I really like the twist I used rather than those perfectly centered shapes (I just think it makes the card more interesting).

So there you have it, simple, clean and beautiful.  All the supplies can be found on my website at www.craftwithronnie.stampinup.net or by clicking the shopping button at the top of this post.  But don't wait too long or you will miss out as both this designer series paper and the stamp set are retiring.  As always, Happy Crafting!!!

Supplies Used:
Paper:  Petal Promenade DSP (146913), Petal Pink CS (146985), Black CS (121045), and Whisper White CS (100730)
Stamps: Artistically Asian (141781)
Dies: Rectangle Stitched (148551) and Stitched Shapes (145372)
Inks: Smokey Slate (131179) and Memento (132708)
Misc.: Dimensionals (104430)

Friday, April 26, 2019

Another Dragonfly Dreams and Petal Promenade Card

I really wanted to showcase these great products before they retire and are no longer available.  So here is today's card:


I started with a base made of whisper white cardstock (4 1/4 x 11", scored at 5 1/2").  I added a layer of blushing bride cardstock (4 x 5 1/4") and then I really wanted to use the petal promenade designer series paper but I wanted to soften it just a tad.  So to accomplish that I cut a piece of the paper at 3 3/4 x 5" and then took a piece of vellum that I had cut at 4 1/4 x 5" (which I scored at 1/4" and 4" on the 4 1/4 " side) I wrapped that vellum around the designer series paper and folded the scores over to the back side and glued it down.  I then attached that piece to the blushing bride layer and the whole thing to the card base.

I cut the box for the sentiment out of blushing bride cardstock using the Rectangle Stitched dies and then stamped the sentiment with Versa Mark ink and embossed it using the Cooper embossing powder.  I cut the small dragonflies (I used all five this time) out of the beautiful Cooper foil paper (it really did make them pop) and I adhered the dragonflies and the sentiment using the mini dimensionals.  I added a piece of the whisper white sheer ribbon to finish off the card.

Tip:  To keep the vellum closer to the paper and allow the design to show through just a bit more I added some glue dots under the dragonflies and the sentiment so it would pull the vellum closer to the designer series paper but they would not show.

I hope you enjoy this card, I know I sure like how it came out.  I will list the supplies I used below and they can be purchased through my website at www.craftwithronnie.stampinup.net or by clicking the shopping button at the top of this blog.  But do remember that these products are on the retiring list so don't wait and miss out.  As always, Happy Crafting!!!

Supplies Used:
Paper:  Petal Promenade DSP (146913), Copper Foil (142020), Whisper White CS (101650), Blushing Bride (131198), Vellum (101856)
Ink:  Versa Mark (132708)
Dies:  Detailed Dragonfly(142749) and Rectangle Stitched (148551)
Misc.:  Copper Embossing Powder (141636), Whisper White Sheer Ribbon (144172), Mini Dimensionals (144108)

Thursday, April 25, 2019

Dragonfly Dreams and Petal Promenade

I have vowed to use some of my amazing stash of products that will be retiring on June 3rd and wait to start sharing some of the new products until we get closer to the catalog going live to customers.  This is for two reasons, one I want to enjoy creating with current products so I can show you the possibilities so you too can get them before they retire and also because I need to clear my stash for some of the beautiful new products (not that these are not equally beautiful mind you).  So here is a card I made using one of my favorite stamp and die sets that will be retiring along with the beautiful paper I used.

This card just came to me, I have always loved these dragonflies but had never considered them in pink.  Well I had this beautiful variegated petal pink ribbon and when I saw it with the gorgeous bokeh paper which also featured the pink and white I just knew I needed to use it.


So I started with a basic whisper white card base (11 x 4 1/4", scored at 5 1/2") I added a layer of petal pink cardstock (4 x 5 1/4") and a layer of the petal promenade pink and white bokeh paper (3 3/4 x 5").  Hey remember my tip and cut the dragonflies out of the center of the pink layer (this saves paper and keeps the mailing weight down.

I stamped the underside of the dragonfly with Blushing Bride ink onto very vanilla cardstock and then cut the large dragonfly and the small ones out of the petal pink (I did cut off a couple of the small dragonflies because I liked the look of three verses five and I adhered the large petal pink dragonfly onto the very vanilla piece I had stamped but only down the center so the wings would look more 3-D).  I adhered the small dragonflies directly onto the paper but I did shape the wings of the large dragonfly (just used my bone folder) and popped it up with dimensionals.  I stamped the sentiment with Memento ink and simply assembled the card.

I love how soft this card looks, it will be perfect for that special friend.  I will list all the supplies I used below and they can all be found on my website (at least until they retire so don't wait) at www.craftwithronnie.stampinup.net  or by clicking the shopping button at the top of this post.  As always, Happy Crafting!!!

Supplies Used:
Paper: Petal Promenade DSP (146913), Petal Pink CS (146985), Very Vanilla CS (101650), Whisper White CS (100730)
Inks: Blushing Bride (131172), Memento Ink (132708)
Stamp Set: Dragonfly Dreams (142924)
Dies: Detailed Dragonflies (142749
Misc.: Petal Pink Variegated Ribbon (148776), Dimensionals (104430)

Monday, April 22, 2019

On Stage Charlotte 2019

So I received my notice that my Product Purchase Premiere (pre-order of new products from the new annual catalog) has been shipped and will be here sometime next Wednesday.  So in the mean time I thought it would be fun to post pictures of the amazing cards I received while swapping at the event.  As you know if you have been following me that past few weeks I went a little crazy making swap cards (because I am new to Stampin Up and I want as much inspiration as I can get) to swap with others attending the event.  I made a total of 125 cards and swapped about 115 of them for cards and even a few 3-D items.  Here are some pics of what I received:


Wow, now there is a bunch of talent right there.  I was thrilled with everything I received and can't wait to try a few of these myself.  I have posted the instructions for all the ones I made for the event here on my blog.  But this one is one of my favorites of the bunch:


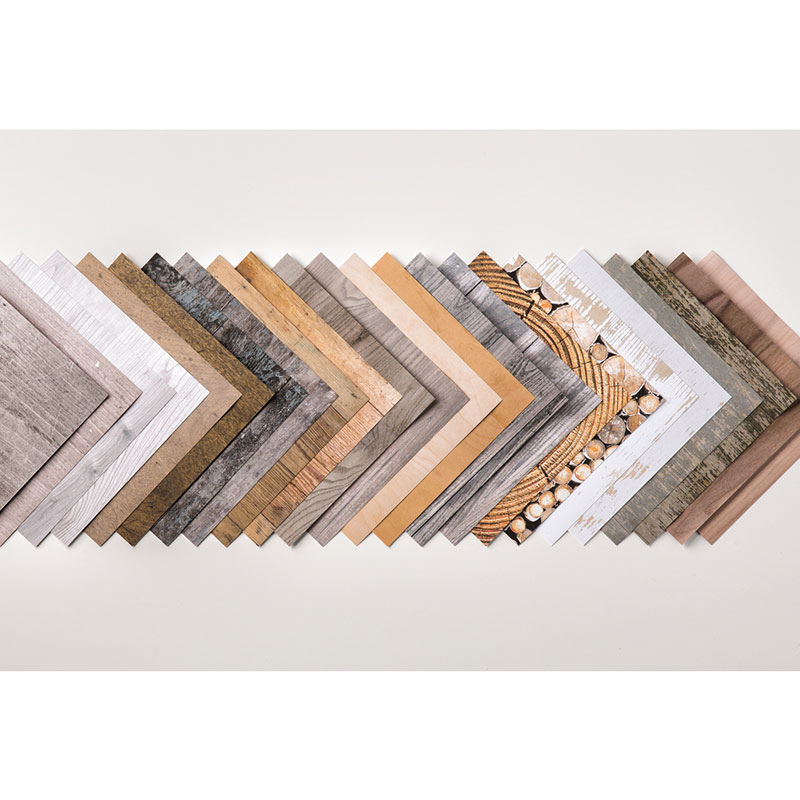
I was sad to see that County Livin' the stamp with the boots (it also has a guitar and an adorable old pickup truck in it) is retiring.  I also will be seriously missing this Wood Textures 6 x 6" Designer Series Paper (I actually ordered a few packs of this to stash away for future projects).  If either of these catches your eye be sure to get your order in quick before they are retired and gone for good.  I will put the information for both of them below.  You can order at www.craftwithronnie.stampinup.net or by clicking the shopping button at the top of this blog.  As always, Happy Crafting!!!


Wood Textures 6" x 6" Designer Series Paper Item # 144177 ($11.00 / 48 sheets / 4 each of 12 double sided designs)

Country Livin' Stamp Set Item # 141925 (clear mount $15 / wood mount $20)