
Saturday, December 7, 2013
So excited. Close to My Heart is offering a special for one month only in January. A card kit that makes 2 each of 5 different designs for just $15 with a $35 purchase. As a consultant I got to order one in December and it came today. Can't wait to start making these (I love Christmas but I am sooo ready for something else) and these are just the ticket. Bright spring like colors. Also, I will post pics when I finish along with the pics of others I will make using other papers and just the guide from the kit. I always keep the instructions and remake them to fit other color selections etc. So here is a pic of the kit and if you are interested it can be ordered after January 1st, so feel free to visit my website as well at www.craftwithronnie.ctmh.com

Friday, November 29, 2013
Starburst Christmas Cards
Just learned how to make these cute Starburst cards. Here are some pics and instructions. Hope you like them.
Start by selecting four different papers (I used the Close to My Heart Sparkle and Shine Paper pack) and cut each into a piece that is 1 1/2 x 4" and cut each on a diagonal from the top right to bottom left corner.
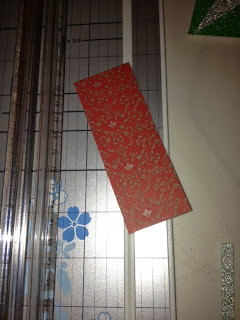 This is what it looks like cut, do that to all four pieces


Continue to work around both sides until all pieces are glued down. When complete and project dry cut away excess from the cardstock


I made my sentiment using the same papers from the Starburst and the Close to My Heart Artiste Cartridge and Holiday Tags stamp set.


Start by selecting four different papers (I used the Close to My Heart Sparkle and Shine Paper pack) and cut each into a piece that is 1 1/2 x 4" and cut each on a diagonal from the top right to bottom left corner.


Next, turn cut pieces so the large piece is on top and alternate the colors as shown below. Cut a piece of cardstock (any color) 5 x 2 3/4" and make the center mark at 2 1/2" on the top and bottom. Cover the cardstock with glue.

Center the first two pieces for each side of the starburst on the marks you made at 2 1/2" and glue down

Continue to work around both sides until all pieces are glued down. When complete and project dry cut away excess from the cardstock

I decided to add a little border trim as well and just took a piece of coordinating paper and cut it to a length of 5" and a width of 1 1/4" and put a little punch around one side.

I then glued both the trim and the cardstock to an A-2 card base.

I made my sentiment using the same papers from the Starburst and the Close to My Heart Artiste Cartridge and Holiday Tags stamp set.

Place the sentiment on the card using dimensional dots to give it a lift.

Finished project takes no time and looks great. All the products listed can be found on my website at www.craftwithronnie.ctmh.com
Wednesday, November 27, 2013
More Christmas cards


This one was made using embossing folders and my cuttlebug (instructions for this technique posted previously). I added some Close to My Heart sentiment stamps, a little ribbon and of course bling.

These are the final result of the Frosted Card Kit from Close to My Heart. I was pleased with how well they turned out and how fun and simple they were to make.

I used the Santa's Greetings mini stamp from Close to My Heart (at just $2.95 it is a steal) some fun papers and markers and I think they turned out great. These are tri-fold cards (instructions for this technique are posted in a previous blog). Well back to crafting. Have fun!!

Tuesday, November 26, 2013


Ok so I am on a roll today. I love this new Close to My Heart Cricut cartridge. I can't stop with these cool 3D items. Here is a cute gift bag for Fathers Day and this little purse is awesome (made the bow from the cartridge also and used it as the closure as well, just tucked the top of the purse down into it). The purse would be a great gift card holder.


Here are some cute swing cards I made. They took just minutes but look very classy. Made them using my Artiste Cricut cartridge from Close to My Heart (there are over seven hundred items on the cartridge including several of these)view on my website at www.craftwithronnie.ctmh.com I just love how these turned out.

This one was made using an embossing folder and then I sanded the embossed part to give it an aged look. Also used an EK punch to do the cute little flowers.

These were very simple clean cards. Used my "Just a Number" stamp set from Close to My Heart for the sentiments: "Over the hill? What hill? Where? When?" and then on the inside it says "I don't remember any hill." The other says" Inside every older person is a younger person... " and on the inside it says, "wondering what happened." A little twine and ribbon and they are beautiful

These were made using my Artiste Cricut cartridge from Close to My Heart. Love the swing card (bottom left) it looks like a man's shirt pocket and the stamp that comes with the cartridge is perfect with it. I really had some fun with these cards.
Finished up the cards I was making for my mother-in-law for Christmas. I made her a total of about 45 cards. These are some of them. Now I need to get busy with my Christmas cards.
Friday, November 8, 2013
Ok need a break from the simple so let’s try a
Tri Shutter Card
Select three patterned papers and two solid colors
to use. Cut card base to 5 ½ x 12”,
score at 2”, 4”, 8” and 10”. Go 1 ½”
into card base and cut from 2” to 10” and then move card over to 4” in and cut
from 2” to 10” again. Now fold card up
and down and up and down on each of the score marks. Push the middle score lines in the opposite
direction. Now adorn card with solids
cut 1/4” smaller than the base areas and then with patterned paper that is cut
3/16 inch smaller than the cardstock.

Thursday, November 7, 2013
I am continuing the journey of card making for mom’s
Christmas gift. These instructions will
make one of each of the cards in the photo.
I selected the Huntington B&T
(background and texture) paper from Close to My Heart (CTMH) for the main stage
on this card. I just love this paper and
knew mom would also. I also used the CTMH sunset
and topiary cardstock on the card. It
was a very simple card to make. I started by
cutting the long panels to widths of ¾”
and 1 ½” (one each of the sunset and topiary cardstock), I then ran it through my Cuttlebug with a swiss dot embossing folder (my favorite
folder because it is so versatile). I
then cut 2 of the Huntington B&T at 2 ¼”.
Now cut all of the long panels to a length of 6 ¼” and mounted them on a
plain white base that’s finished size is 5 x 6 ½”. Next I cut three each of the sunset and
topiary cardstock to 1 ½” square and three each of them again at 1 ¼”
square. Now I cut 6 pieces of white
cardstock at 1” square and stamped with a simple stamp. Added the sentiment which I stamped from CTMH
Holiday Tags Occasion’s set and of course some bling and there you have
it.

For Christmas this year my mother-in-law requested a
box of handmade cards. She did have an
additional request that they be simple and without a lot of embellishments and
three dimensional items (seems she was not happy with paying from $.66 to over
a $1.00 to mail some of the ones I had previously given her). So I embarked on the journey today to do
simple (very hard for me). But here are
some of the ones I came up with. These
embossed ones were very simple, just used my Cuttlebug and some embossing folders. Cut the white cardstock to 4 ½ x 6 ½” and ran
it through the embossing folder from the top to about 1 ½” then took it out and
moved the folder to the bottom (leaving about a 1 ½” area that was not
embossed) and embossed. I then took this
white cardstock out and put it upside down on my score-pal (you can see where
it is embossed and where it is not) and drew a nice crisp line at the top and
bottom of the un-embossed area. Then I
stamped the message I had selected.
Added ribbon and twine and mounted and there you go, nice simple, clean
cards that will mail off fine with a first class stamp.


Will work on more tomorrow. Have a great day and keep on crafting!!!!!!!!!!!!
Subscribe to:
Posts (Atom)
-
 Today’s card features the new Prairie Grass stamp set and the Textured Notes Dies. I also used some Thoughtful Journey Designer Series Pap...
 -
 Today’s card features one of the Products of the Month, Begonia Belle. This stamp set was the July 2026 Product of the Month, however, it i...
 -
 Today’s card features the Butterfly Flight and Classic Greetings Hot Foil Dies along with the Everyday Essentials Mix and Match Designer Ser...
 -
 Today’s card features both the Botanical Glow and Classic Greetings Hot Foil Dies along with the Extraordinary Flora Washi Tape. I had seen...
 -
 Today’s card features the Fern & Flora Bundle and the Moonlit Flora Designer Series Paper. I fell in love with this suite the first tim...
 -
Today’s card features the new Moonlit Flora Designer Series Paper and the new Fern & Flora Bundle. I knew when I saw this suite of pro...
-
 Today’s card is all about snowflakes. As I said yesterday there are a number of retiring products from the July – December Mini catalog tha...
 -
 I am continuing on with my Christmas cards. Today I worked with the Poinsettia Petals Bundle and Gold Foil and I am really pleased with th...
 -
 Today’s card features the Nature’s Symphony Bundle and Season of Elegance Designer Series Paper supported by the Everyday Arches Dies. I l...
 -
 Today’s card features the lovely Flower Fair Stamp Set. This set is an online exclusive that has been moved to the last chance shopping be...

