I have not made one of these starburst cards in a while, I really don’t know why I haven’t because they are easy and turn out so pretty. Today’s card features the Tidings of Christmas Designer Series Paper and the Evergreen Elegance Stamp Set.
Here is what it looks like when finished…
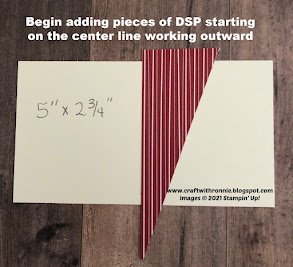
So lets get started with our card. First you will need to cut 4 pieces of Designer Series Paper that measure 1 ½ x 4”. Cut your pieces into triangles as shown in the photos below.
Once you
have all your pieces attached you can flip it over and trim off all the pieces
that overhang the edges of your base. (see
photos below)
Once I got to this point, I cut a piece of Basic White
cardstock to 4 x 5 ¼” and stamped the sentiment “Merry Christmas” from the
Evergreen Elegance stamp set onto the bottom right corner using Real Red ink. I then attached the starburst layer to that
layer. When everything was attached, I wrapped
a piece of Real Red Ribbon around where the starburst layer meets the Basic
White layer and attached it in the back.
I mounted the whole thing onto the card base which was Evening Evergreen
cardstock that is cut 5 ½ x 8 ½”, scored at 4 ¼”. To finish off the card I added three little
Red Rhinestones.
The inside of the card is another piece of Basic White
cardstock cut to 4 x 5 ¼” and I stamped the sentiment (also from the same stamp
set) in Real Red ink.
I hope you enjoy this card I certainly enjoyed making
it. As always you can find the supplies
to create this card and much more on my website at https://craftwithronnie.stampinup.net
or by click the shopping button at the top of this blog or the link to the
supplies listed below.
Happy Crafting!!!


.jpg)


No comments:
Post a Comment