Featured Post

FUN WITH TEMPLATES

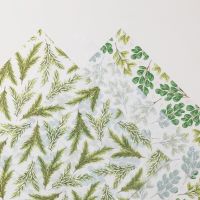
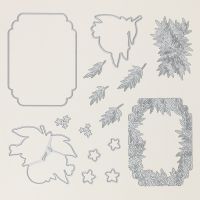
Today’s card features the Fern & Flora Bundle and the Moonlit Flora Designer Series Paper.  I fell in love with this suite the first tim...

Sunday, August 11, 2024

DESIGNER SERIES PAPER SALE

Sales Period: 6–31 August 2024

Who doesn’t love a sale especially when it is Stampin’ Up! Designer Series Paper which is hand created in house. Their artists design, sketch, paint, etc. the patterns you see on the paper. Its durability and utility are perfect for all types of paper crafts. The following paper is part of the sale: 

  • Bright & Beautiful 
  • Countryside Inn 
  • Country Lace 
  • Country Woods
  • Full of Life
  • Lily Pond Lane
  • Mediterranean Blooms 
  • Perennial Lavender 
  • Take to the Sky 
  • Thoughtful Journey 
  • To Market 
  • Unbounded Beauty 
  • Wildly Flowering 
  • Winter Meadow 


Additional Details

  • Specialty paper, cardstock assortments, Designer Series Paper stacks, and paper not yet live is not included in the sale. 
  • Customers must open and close the order during the allotted dates to receive the discount. 
  • There are NO limits on ordering. However, product is only available while supplies last. 
  • Designer Series Paper purchased with Stampin’ Rewards or as part of a Starter Kit WILL qualify for the discount. 

*Please note, the following paper is featured in the Annual Catalog, but is from previous product releases: 

  • Bright & Beautiful 
  • Countryside Inn 
  • Perennial Lavender 
  • Winter Meadow


Season of Green & Gold Project Sheet Free With Qualifying Purchase

Hello there fellow crafters.  This month I am offering free PDF instructions that create 8 cards, 4 gift tags and 3 boxes with any purchase of $50 or more (before taxes and shipping) during August.  To see the projects check out my blog post on August 6, 2024.   

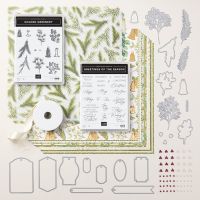
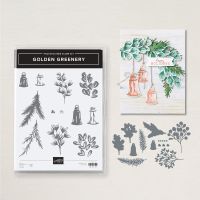
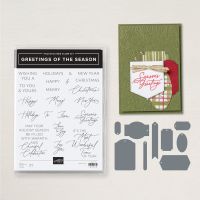
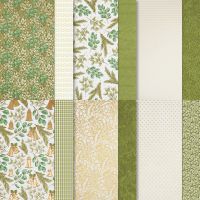
These were created using primarily the products from the new online product called the Seasons of Green and Gold Collection.  To create these, I used a half a package of each the Seasons of Green & Gold 12 x 12” Specialty Designer Series Paper and the Graceful Greenery Vellum 12 x 12” Specialty Designer Series Paper along with 1 piece of Gold Foil, some of the coordinating embellishments (I have not added many of these to the projects yet as I am waiting for some more to arrive), the coordinating ribbon and I did use both the Golden Greenery Bundle and Greeting of the Seasons Bundle (this bundle was for sentiments and could be replaced with any set you have).

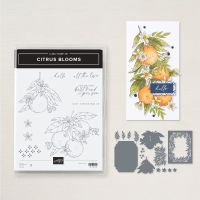
Some other items I did use were the Citrus Blooms Dies (for the larger box), the Stylish Shapes Dies and Nested Essentials Dies (these could be changed out with any shape dies you have on hand).  I also used the Destressed 3D Embossing Folder, Gold Embossing Powder, some additional ribbon (not Stampin’ Up!), the Gold and Silver 1/8” ribbon, and white twine.  The inks I used included Cherry Cobbler, Old Olive, Mossy Meadow, Pecan Pie and VersaMark and my Light Pecan Pie Stampin’ Blend Marker. 

Cardstock used: 5 sheets Old Olive, 1 sheet Cherry Cobbler, 1 ½ sheets Basic White, 3 sheets Very Vanilla, 2 ½ sheets Mossy Meadow and 1 sheet of Crumb Cake. 

Supply List is provided in August 6, 2024 blog post.

Be sure to follow me at: 

Facebook at:  https://www.facebook.com/craftwithronnie.stampinup.net

YouTube at: https://www.youtube.com/@ronniejohnsonstampinup

Instagram: https://www.instagram.com/craft_with_ronnie/


Happy Crafting!!!


Tuesday, August 6, 2024

Season of Green & Gold Project Sheet

Hello there fellow crafters, I found so much inspiration for these products from all over the crafting community so I wanted to see what I could do with it as well.  During September and October I am offering free PDF instructions that create 8 cards, 4 gift tags and 3 boxes with any purchase of $50 or more (before taxes and shipping) during September using Host Code:  9YB6Q2D6 and I will email you the PDF or you may contact me and purchase it for $15.  Here are some quick pics of the projects…

Card and coordinating Gift Tag

Card and coordinating Gift Tag

2 Cards

2 Cards

2 Cards

Box (which holds the tags) and 2 Gift Tags

Small treat box

Medium size treat box

These projects were created using primarily the products from the new online product called the Seasons of Green and Gold Collection.  To create these, I used a half a package of each the Seasons of Green & Gold 12 x 12” Specialty Designer Series Paper and the Graceful Greenery Vellum 12 x 12” Specialty Designer Series Paper along with 1 piece of Gold Foil, some of the coordinating embellishments (I have not added many of these to the projects yet as I am waiting for some more to arrive), the coordinating ribbon and I did use both the Golden Greenery Bundle and Greeting of the Seasons Bundle (this bundle was for sentiments and could be replaced with any set you have).  

Some other items I did use were the Citrus Blooms Dies (for the larger box), the Stylish Shapes Dies and Nested Essentials Dies (these could be changed out with any shape dies you have on hand).  I also used the Destressed 3D Embossing Folder, Gold Embossing Powder, some additional ribbon (not Stampin’ Up!), the Gold and Silver 1/8” ribbon, and white twine.  The inks I used included Cherry Cobbler, Old Olive, Mossy Meadow, Pecan Pie and VersaMark and my Light Pecan Pie Stampin’ Blend Marker. 

Cardstock used: 5 sheets Old Olive, 1 sheet Cherry Cobbler, 1 ½ sheets Basic White, 3 sheets Very Vanilla, 2 ½ sheets Mossy Meadow and 1 sheet of Crumb Cake. 

I will list the major components below.

Happy Crafting!!!

Ronnie

Full Collection:

Product List


Individual Items: (Citrus Blooms Dies needed for 2 of the boxes, however other dies can be replaced with shapes you currently have for the cards and tags)

Product List

class="MsoNormal">


Monday, August 5, 2024

SENDING LOVE & HUGS

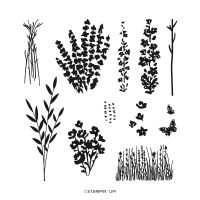
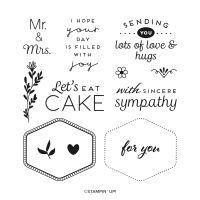
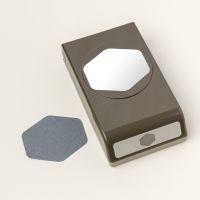
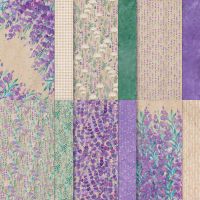
Today’s card features the Perennial Lavender Designer Series Paper and the coordinating Painted Lavender stamp set along with the Heartfelt Hexagon stamp set and it’s coordinating Punch.  I love this paper, it is just so pretty and it makes me happy every time I work with it.  I was inspired to make this card by one I saw that was made by Collen Magness.  

Here is what I came up with…

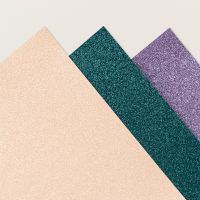
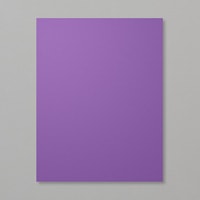
The card base is Gorgeous Grape cardstock cut to 6 ¾ x 5 ½”, scored at 4 ¼”.  I added a piece of the Three-Color Glimmer (I used the purple) that measured 2 ¼ x 5 ¼” to the left side of the card base.  I then cut a piece of the Perennial Lavender DSP to 2 x 5” and added that on top of the glimmer paper.  Now it was time to create my little flag that folds over the card front.  I cut a piece of Gorgeous Grape cardstock to 1 x 4 ¼” and scored it at ½”.  I then cut another piece of the Glimmer paper this time to ¾ x 4 ¼”, scored at ½”.  (Note: I did emboss my gorgeous grape piece with one of the Basics 3D Embossing Folders, these are now retired.  You can use another Embossing Folder or simply not emboss the piece, your choice).  I attached the two pieces together, cut a flag on the left end, and then attached the ½” scored piece to the center of the right side of my card (Note: I did figure out where my white inside layer would lay and made sure my fold was completely under that before adhering it down). 

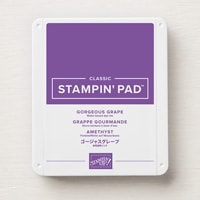
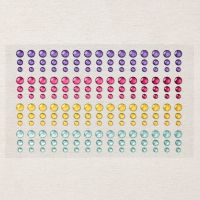
To finish off the card I stamped the sentiment “SENDING YOU lots of love & hugs” from the Heartfelt Hexagon stamp set onto a scrape of basic white cardstock using Gorgeous Grape Ink.  I punched this piece out using the Heartfelt Hexagon Punch and added it to the center of my little flag.  I stamped some of the Painted Lavender stamps on the right side of my card using Gorgeous Grape Ink (from the right to left I stamped the first fully inked, the second without re-inking and the third with full ink, I did drop the stamp a little each time to make them different heights) onto a piece of Basic White cardstock that measured 4 x 5 ¼”.  I added three of the Glossy Dots Assortment and my card was complete.

I hope you enjoy this card I certainly enjoyed making it.  As always you can find the supplies to create this card and more on my website at https://www.stampinup.com?demoid=2206796 or by clicking the shopping button at the top of this blog or the link to the supplies listed below.  Be sure to follow me at: 

Facebook at:  https://www.facebook.com/craftwithronnie.stampinup.net

YouTube at: https://www.youtube.com/@ronniejohnsonstampinup

Instagram: https://www.instagram.com/craft_with_ronnie/


Happy Crafting!!! 

Product List

Friday, July 19, 2024

LARGER MEDITERRANEAN BLOOMS TREAT BOX

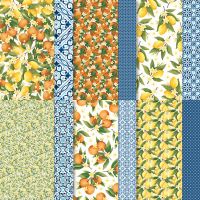
Today’s project is a little bigger box created using the Citrus Blooms Bundle and the Mediterranean Blossoms Designer Series Paper (DSP)  I saw a box like this that Angie Pyjas had created and decided to make it with a few changes of my own.  I hope you enjoy it, I think I am going to adapt this to use some new Christmas paper I have on order because it will make cute little gift boxes for under my tree this year. 

Here is what I came up with…


First, I started by cutting out the top and bottom of my box.  I started with die #1 (see the photo below) from the Citrus Bloom Bundle, I cut one out of the Mediterranean Blossoms DSP (I picked the little lemon one) one out of Old Olive cardstock and one out of Lemon Lolly cardstock.  I adhered the DSP one to the Old Olive cardstock one (this makes it stronger but it also gave the inside of my box a little cleaner look rather than seeing the backside of the DSP.  I then die cut pieces #1 and #2 out of Basic White cardstock and attached that to the top of the DSP (note here, if you line die #2 up inside die #1 and just put a small piece of tape on each side to keep them from moving during die cutting you will love the results), this created the top of the box.  I set it and the Lemon Lolly die cut aside while I worked on the box. 

For the box I cut a piece of Lemon Lolly cardstock to 7 x 6” and scored it on the 7” side at 1 ½” and 5 ½”.  Then I scored to 6” side at 1 ½” and 4 ½”.  I scored all those lines and cut as shown below (those little v’s on the flaps help to debulk the corners for a sharper box).  I added adhesive to the tabs and folded them in to create the box.  (see photos below).  Next, I created the flip part for the lid of the box.  I cut a piece of Lemon Lolly cardstock to 4 x 3 ½” and scored the 3 ½” side at 1” and 2 1/2”.  At this point it is time to start to assemble the box.


I added my flip part to the bottom of my box by adhering one of the sides that was scored to the bottom of the box.  Then I mounted my box in the center of the Lemon Lolly die cut that I cut for the bottom of the box.  Next, I added adhesive to the two other sides of the flip part and adhere to the bottom and back of the box (see photo).  At this point I went ahead and attached the top of my box being sure to center it on the box and lining it up with the bottom die cut (it is adhered to the third flap on the flip piece. 

Next it was time to create my latch.  I cut a piece of Lemon Lolly cardstock to 1 x 2 ¼” and scored it at 1”.  I used a corner rounder and rounded the long end.  I have these little magnets I purchased from Amazon (craft stores sell them as well) so I attached one to the back of my flap using a Mini Glue Dot and then placed the other side of the magnet on that one and put a Mini Glue Dot on it.  I lined the tab up with the center of the front of the box and pushed it into place, securing the magnet onto the box itself.  This allowed me to see exactly where on the top of the box to adhere my tab.  I added adhesive to the 1” part of the tab and pressed down with the lid allowing some time for the glue to dry before opening the box. 

Now to decorate the rest of the box.  I cut some of the Mediterranean Blooms DSP for the front, back and sides.  The front and back pieces measured 1 3/8 x 3 7/8” and the sides measured 1 3/8 x 2 7/8” (note the front piece covers up the magnet nicely for a cleaner look.  For the top of the box lid, I fussy cut one of the lemon bunches out of the DSP and added it with Dimensionals.  I stamped my sentiment “hello” from the bundle onto a scrap of Lemon Lolly cardstock using Old Olive Ink and die cut it using the Stylish Shapes Dies (this could be a punch or just a rectangle of paper if you don’t have these dies), I popped that up with Dimensionals as well.  I added three of the Tinsel Gems and that finished up my box.

I am quite happy with the results of the box and I think it will be great using lots of other DSP’s and colors as well.  I hope you enjoy this project I certainly enjoyed making it.  As always you can find the supplies to create this project and more on my website at https://www.stampinup.com?demoid=2206796 or by clicking the shopping button at the top of this blog or the link to the supplies listed below.  Be sure to follow me at: 

Facebook at:  https://www.facebook.com/craftwithronnie.stampinup.net

YouTube at: https://www.youtube.com/@ronniejohnsonstampinup

Instagram: https://www.instagram.com/craft_with_ronnie/


Happy Crafting!!!

Product List

Wednesday, July 17, 2024

MEDITERRANEAN BLOOMS TREAT BOX

Today’s project is a cute little box that was created using the Citrus Blooms Bundle and the Mediterranean Blossoms Designer Series Paper (DSP)  I saw this box created by Laurens Scrap Lot and decided to give it a whirl with a few changes of my own.  I hope you enjoy it, I think it would make some great table gifts or maybe Christmas Stocking gifts with some different decorations. 

Here is what I came up with…


First, I started by cutting out die #1 (see the photo below) from the Citrus Bloom Bundle, I cut one out of the Mediterranean Blossoms DSP (I picked the little yellow and green flowered paper) and one out of Lemon Lolly cardstock.  I adhered the DSP one to the cardstock one (this makes it stronger but it also gave the inside of my box a little cleaner look rather than seeing the backside of the DSP.  I then scored this piece at 2 1/8” and 3”.  Cut a piece of ribbon (I used some retired ribbon from my stash but you can use anything you have that coordinates) to 18”.  I ran a piece of Tear & Tape down the inside center of the long side of the die cut piece leaving about ¼” free on each side.  I attached my ribbon to that tear and tape leaving equal lengths on each side (this will be used to tie the box shut).


Next it was time to create the box, I cut a piece of Lemon Lolly cardstock to 4 x 6 ¼” and scored it on the 4” side at ¾” and 3 ¼” and on the 6 ¼” side at ¾”, 2 ¾”, 3 ½” and 5 ½”.  See the diagrams below for scoring, cutting and assembly.  Once my box was complete, I place it inside my die cut piece (being sure to get it centered under the die cut piece) and adhered both the bottom and the top of the box.  Then I just tied it shut using my ribbon.


To decorate the top of my box I used die #3 from the bundle and cut it out of Old Olive cardstock and attached it to the top of my box.  I then cut my circle out of a scrap of Basic White cardstock using one of the beautiful circle dies (boy these have come in very useful recently) from the Spotlight On Nature Dies.  I stamped that with the sentiment “YOU’RE THE best kind OF person” using Old Olive Ink.  I popped this up on the center of my box using Dimensionals.  Then, I fussy cut one of the flowers out of the DSP and adhered it to the circle and added two of the Opal Rounds Assortment Embellishments. 

I was really happy with this little box and I am looking forward to making a bunch of them to gift to the staff at my Mother In Laws Assisted Living Facility as a thank you for all they do for her. 

I hope you enjoy this project I certainly enjoyed making it.  As always you can find the supplies to create this project and more on my website at https://www.stampinup.com?demoid=2206796 or by clicking the shopping button at the top of this blog or the link to the supplies listed below.  Be sure to follow me at: 

Facebook at:  https://www.facebook.com/craftwithronnie.stampinup.net

YouTube at: https://www.youtube.com/@ronniejohnsonstampinup

Instagram: https://www.instagram.com/craft_with_ronnie/


Happy Crafting!!!

Product List