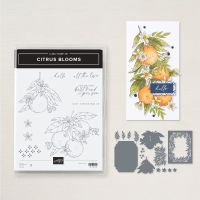
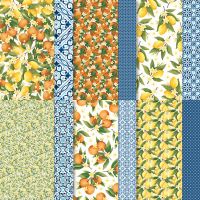
Today’s project is a little bigger box created using the Citrus Blooms Bundle and the Mediterranean Blossoms Designer Series Paper (DSP) I saw a box like this that Angie Pyjas had created and decided to make it with a few changes of my own. I hope you enjoy it, I think I am going to adapt this to use some new Christmas paper I have on order because it will make cute little gift boxes for under my tree this year.
Here is what I came up
with…
First, I started by cutting out the top
and bottom of my box. I started with die
#1 (see the photo below) from the Citrus Bloom Bundle, I cut one out of the
Mediterranean Blossoms DSP (I picked the little lemon one) one out of Old Olive
cardstock and one out of Lemon Lolly cardstock.
I adhered the DSP one to the Old Olive cardstock one (this makes it
stronger but it also gave the inside of my box a little cleaner look rather
than seeing the backside of the DSP. I
then die cut pieces #1 and #2 out of Basic White cardstock and attached that to
the top of the DSP (note here, if you line die #2 up inside die #1 and just put
a small piece of tape on each side to keep them from moving during die cutting
you will love the results), this created the top of the box. I set it and the Lemon Lolly die cut aside
while I worked on the box.
For the box I cut a piece of Lemon Lolly
cardstock to 7 x 6” and scored it on the 7” side at 1 ½” and 5 ½”. Then I scored to 6” side at 1 ½” and 4 ½”. I scored all those lines and cut as shown
below (those little v’s on the flaps help to debulk the corners for a sharper
box). I added adhesive to the tabs and
folded them in to create the box. (see
photos below). Next, I created the flip
part for the lid of the box. I cut a
piece of Lemon Lolly cardstock to 4 x 3 ½” and scored the 3 ½” side at 1” and 2 1/2”. At this point it is time to start
to assemble the box.
I added my flip part to the bottom of my
box by adhering one of the sides that was scored to the bottom of the box. Then I mounted my box in the center of the
Lemon Lolly die cut that I cut for the bottom of the box. Next, I added adhesive to the two other sides
of the flip part and adhere to the bottom and back of the box (see photo). At this point I went ahead and attached the
top of my box being sure to center it on the box and lining it up with the
bottom die cut (it is adhered to the third flap on the flip piece.
Next it was time to create my latch. I cut a piece of Lemon Lolly cardstock to 1 x
2 ¼” and scored it at 1”. I used a
corner rounder and rounded the long end.
I have these little magnets I purchased from Amazon (craft stores sell
them as well) so I attached one to the back of my flap using a Mini Glue Dot
and then placed the other side of the magnet on that one and put a Mini Glue Dot
on it. I lined the tab up with the center
of the front of the box and pushed it into place, securing the magnet onto the
box itself. This allowed me to see
exactly where on the top of the box to adhere my tab. I added adhesive to the 1” part of the tab
and pressed down with the lid allowing some time for the glue to dry before
opening the box.
Now to decorate the rest of the box. I cut some of the Mediterranean Blooms DSP
for the front, back and sides. The front
and back pieces measured 1 3/8 x 3 7/8” and the sides measured 1 3/8 x 2 7/8”
(note the front piece covers up the magnet nicely for a cleaner look. For the top of the box lid, I fussy cut one
of the lemon bunches out of the DSP and added it with Dimensionals. I stamped my sentiment “hello” from the
bundle onto a scrap of Lemon Lolly cardstock using Old Olive Ink and die cut it
using the Stylish Shapes Dies (this could be a punch or just a rectangle of
paper if you don’t have these dies), I popped that up with Dimensionals as
well. I added three of the Tinsel Gems
and that finished up my box.
I am quite happy with the results of the box
and I think it will be great using lots of other DSP’s and colors as well. I hope you enjoy this project I certainly
enjoyed making it. As always you can
find the supplies to create this project and more on my website at https://www.stampinup.com?demoid=2206796 or by clicking the
shopping button at the top of this blog or the link to the supplies listed
below. Be sure to follow me at:
Facebook
at: https://www.facebook.com/craftwithronnie.stampinup.net
YouTube
at: https://www.youtube.com/@ronniejohnsonstampinup
Instagram: https://www.instagram.com/craft_with_ronnie/
Happy Crafting!!!
Product List







.jpg)


No comments:
Post a Comment