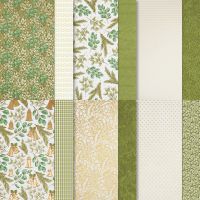
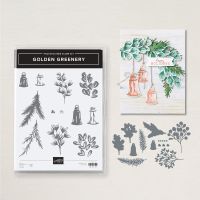
Today’s card features the Seasons of Green & Gold 12 x 12” Specialty DSP and the Golden Greenery Bundle. I love this paper and I have made tons of projects with it (check out my post from August 6th so see a bunch of them that I created for a workshop) so I wanted to create something non-Christmas with the paper to showcase its versatility, here is what I came up with…
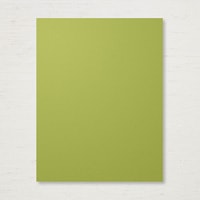
The card base is Old Olive cardstock cut
to 5 ½ x 8 ½” and scored at 4 ¼”. I
added a layer of the Seasons of Green & Gold DSP that measured 4 x 5 ¼” to
that. Then I added a strip of a
beautiful Very Vanilla and Gold DSP from the package that measured 1 3/8 x 4”
to it about 1” from the top of the card, before attaching this piece I did wrap
a piece of the ¼” Cream Woven Ribbon around it and tied it in a square
knot.
To decorate the front of the card I die
cut three of the foliage pieces, two image #1 and one image #3 from figure #1 see
below, from the Seasons of Green & Gold DSP using the coordinating dies (images
#2 and #3 from figure #2 below) from the Golden Greenery Bundle (I love that the
dies coordinate and cut these pieces out of the DSP). I adhered the two image #1 pieces directly to
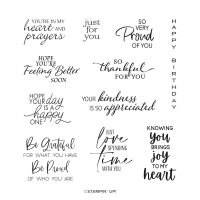
the card and popped up the image #3 piece using Mini Dimensionals. I stamped the sentiment “HAPPY BIRTHDAY” from
the So Sincere stamp set in Old Olive Ink onto a scrap of Very Vanilla
cardstock and die cut it out using the Greetings of the Seasons Dies (the long
thin tag). I added a Linen Thread Bow to
it and popped it up on the card using Mini Dimensionals.
For the inside of the card, I cut a piece of Very Vanilla cardstock to 4 x 4 ¼” and stamped it using the Golden Greenery Dies from the bundle. I stamped it by first stamping image #12 shown in Figure #3 in Old Olive Ink and then stamped over that using the stamp in image # 11 shown in Figure #3 in Soft Seafoam Ink (it is easier to line the stamps up if you stamp the darker color first).
I hope you enjoy this card I certainly
enjoyed making it. As always you can
find the supplies to create this card and more on my website at https://www.stampinup.com?demoid=2206796 or by clicking the
shopping button at the top of this blog or the link to the supplies listed
below. Be sure to follow me at:
Facebook
at: https://www.facebook.com/craftwithronnie.stampinup.net
YouTube
at: https://www.youtube.com/@ronniejohnsonstampinup
Instagram: https://www.instagram.com/craft_with_ronnie/
Happy Crafting!!!
Product List





.jpg)


No comments:
Post a Comment