As many of you know my husband and I really enjoy traveling and we have been planning this major trip for well over a year. We are doing a 13 day Trans-Atlantic Cruise with stops in the Azores, Malaga Spain, Cartagena Spain, Palma De Mallorea Spain and ending in Barcelona Spain. But that is not the end. We will be staying on board the same ship for an addition 10 day Mediterranean Cruise with stops in Ajaccio Corsica, Cagliari Sardinia, Sicily Italy, Santorini Greece, Athens Greece, Mykonos Greece, Salerno Italy and Rome. But wait there is more, we arrive in Rome on our 41st Anniversary so we will be staying a few days there to celebrate before returning back to the states.
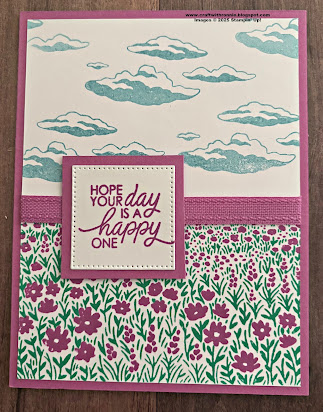
I will not be posting during the trip (I have decided it is time to unplug and recharge) however, I have scheduled posts with new cards each Friday during the month of May. I will be sure to post some great pics when I return.
Happy Crafting!!!!
Ronnie

![Mixed Florals Bundle [ 164642 ] Mixed Florals Bundle [ 164642 ]](https://assets1.tamsnetwork.com/images/EC042017NF/164642s.jpg)
![Happy Hibiscus Bundle (English) [ 164880 ] Happy Hibiscus Bundle (English) [ 164880 ]](https://assets1.tamsnetwork.com/images/EC042017NF/164880s.jpg)
![Forever Plaid 3 D Embossing Folder [ 164049 ] Forever Plaid 3 D Embossing Folder [ 164049 ]](https://assets1.tamsnetwork.com/images/EC042017NF/164049s.jpg)
![Thoughtful Journey 6" X 6" (15.2 X 15.2 Cm) Designer Series Paper [ 163303 ] Thoughtful Journey 6" X 6" (15.2 X 15.2 Cm) Designer Series Paper [ 163303 ]](https://assets1.tamsnetwork.com/images/EC042017NF/163303s.jpg)
![Basic White 8 1/2" X 11" Cardstock [ 159276 ] Basic White 8 1/2" X 11" Cardstock [ 159276 ]](https://assets1.tamsnetwork.com/images/EC042017NF/159276s.jpg)
![Lemon Lolly 8 1/2" X 11" Cardstock [ 161720 ] Lemon Lolly 8 1/2" X 11" Cardstock [ 161720 ]](https://assets1.tamsnetwork.com/images/EC042017NF/161720s.jpg)
![Tuxedo Black Memento Ink Pad [ 132708 ] Tuxedo Black Memento Ink Pad [ 132708 ]](https://assets1.tamsnetwork.com/images/EC042017NF/132708s.jpg)
![Old Olive Stampin' Blends Combo Pack [ 154892 ] Old Olive Stampin' Blends Combo Pack [ 154892 ]](https://assets1.tamsnetwork.com/images/EC042017NF/154892s.jpg)
![Fresh Freesia Stampin' Blends Combo Pack [ 155518 ] Fresh Freesia Stampin' Blends Combo Pack [ 155518 ]](https://assets1.tamsnetwork.com/images/EC042017NF/155518s.jpg)
![Real Red Stampin' Blends Combo Pack [ 154899 ] Real Red Stampin' Blends Combo Pack [ 154899 ]](https://assets1.tamsnetwork.com/images/EC042017NF/154899s.jpg)
![Lemon Lolly Stampin’ Blends Combo Pack [ 161673 ] Lemon Lolly Stampin’ Blends Combo Pack [ 161673 ]](https://assets1.tamsnetwork.com/images/EC042017NF/161673s.jpg)
![Granny Apple Green Stampin' Blends Combo Pack [ 154885 ] Granny Apple Green Stampin' Blends Combo Pack [ 154885 ]](https://assets1.tamsnetwork.com/images/EC042017NF/154885s.jpg)
![Clear Wink Of Stella Glitter Brush [ 141897 ] Clear Wink Of Stella Glitter Brush [ 141897 ]](https://assets1.tamsnetwork.com/images/EC042017NF/141897s.jpg)
![Mini Stampin' Dimensionals [ 144108 ] Mini Stampin' Dimensionals [ 144108 ]](https://assets1.tamsnetwork.com/images/EC042017NF/144108s.jpg)
![Stampin' Dimensionals [ 104430 ] Stampin' Dimensionals [ 104430 ]](https://assets1.tamsnetwork.com/images/EC042017NF/104430s.jpg)


![Textured Notes Cling Stamp Set (English) [ 165548 ] Textured Notes Cling Stamp Set (English) [ 165548 ]](https://assets1.tamsnetwork.com/images/EC042017NF/165548s.jpg)
![Lost Lagoon 8-1/2" X 11" Cardstock [ 133679 ] Lost Lagoon 8-1/2" X 11" Cardstock [ 133679 ]](https://assets1.tamsnetwork.com/images/EC042017NF/133679s.jpg)
![Pretty Peacock 8-1/2" X 11" Cardstock [ 150880 ] Pretty Peacock 8-1/2" X 11" Cardstock [ 150880 ]](https://assets1.tamsnetwork.com/images/EC042017NF/150880s.jpg)
![Pretty Peacock Classic Stampin’ Pad [ 150083 ] Pretty Peacock Classic Stampin’ Pad [ 150083 ]](https://assets1.tamsnetwork.com/images/EC042017NF/150083s.jpg)
![Lost Lagoon Classic Stampin' Pad [ 161678 ] Lost Lagoon Classic Stampin' Pad [ 161678 ]](https://assets1.tamsnetwork.com/images/EC042017NF/161678s.jpg)
![Mini Corrugated 3 D Embossing Folder [ 165559 ] Mini Corrugated 3 D Embossing Folder [ 165559 ]](https://assets1.tamsnetwork.com/images/EC042017NF/165559s.jpg)
![Stylish Shapes Dies [ 159183 ] Stylish Shapes Dies [ 159183 ]](https://assets1.tamsnetwork.com/images/EC042017NF/159183s.jpg)
![Linen Thread [ 104199 ] Linen Thread [ 104199 ]](https://assets1.tamsnetwork.com/images/EC042017NF/104199s.jpg)
![Tinsel Gems Three Pack [ 161624 ] Tinsel Gems Three Pack [ 161624 ]](https://assets1.tamsnetwork.com/images/EC042017NF/161624s.jpg)


![Textured Notes Bundle (English) [ 165556 ] Textured Notes Bundle (English) [ 165556 ]](https://assets1.tamsnetwork.com/images/EC042017NF/165556s.jpg)
![Botanical Textures 12" X 12" (30.5 X 30.5 Cm) Designer Series Paper [ 165545 ] Botanical Textures 12" X 12" (30.5 X 30.5 Cm) Designer Series Paper [ 165545 ]](https://assets1.tamsnetwork.com/images/EC042017NF/165545s.jpg)
![Basic Black 8-1/2" X 11" Cardstock [ 121045 ] Basic Black 8-1/2" X 11" Cardstock [ 121045 ]](https://assets1.tamsnetwork.com/images/EC042017NF/121045s.jpg)
![Basic Gray Classic Stampin' Pad [ 149165 ] Basic Gray Classic Stampin' Pad [ 149165 ]](https://assets1.tamsnetwork.com/images/EC042017NF/149165s.jpg)
![Adhesive Backed Sparkle Gems [ 161288 ] Adhesive Backed Sparkle Gems [ 161288 ]](https://assets1.tamsnetwork.com/images/EC042017NF/161288s.jpg)


![Fields In Bloom Photopolymer Stamp Set [ 163750 ] Fields In Bloom Photopolymer Stamp Set [ 163750 ]](https://assets1.tamsnetwork.com/images/EC042017NF/163750s.jpg)
![So Sincere Cling Stamp Set (English) [ 162283 ] So Sincere Cling Stamp Set (English) [ 162283 ]](https://assets1.tamsnetwork.com/images/EC042017NF/162283s.jpg)
![Petunia Pop 8 1/2" X 11" Cardstock [ 163801 ] Petunia Pop 8 1/2" X 11" Cardstock [ 163801 ]](https://assets1.tamsnetwork.com/images/EC042017NF/163801s.jpg)
![Shy Shamrock Classic Stampin Pad [ 163808 ] Shy Shamrock Classic Stampin Pad [ 163808 ]](https://assets1.tamsnetwork.com/images/EC042017NF/163808s.jpg)
![Petunia Pop Classic Stampin Pad [ 163811 ] Petunia Pop Classic Stampin Pad [ 163811 ]](https://assets1.tamsnetwork.com/images/EC042017NF/163811s.jpg)
![Balmy Blue Classic Stampin' Pad [ 147105 ] Balmy Blue Classic Stampin' Pad [ 147105 ]](https://assets1.tamsnetwork.com/images/EC042017NF/147105s.jpg)
![Petunia Pop 3/8" (1 Cm) Bordered Ribbon [ 163785 ] Petunia Pop 3/8" (1 Cm) Bordered Ribbon [ 163785 ]](https://assets1.tamsnetwork.com/images/EC042017NF/163785s.jpg)


.jpg)


