Featured Post

FUN WITH TEMPLATES

Today’s card features the Fern & Flora Bundle and the Moonlit Flora Designer Series Paper.  I fell in love with this suite the first tim...

Monday, July 21, 2025

BEAUTIFUL GALLERY IN AN ARCH

Today’s card features the Beautiful Gallery DSP the Everyday Arches Dies, the Beautiful Motifs Stamp Set and the Damask Designs Embossing Folder.  I grabbed all these products which are a mix of items from the Annual Catalog along with Online Exclusives and all from different collections so I could show that you can mix and match most of the Stampin’ Up! Products which makes your crafting dollars go further.

Here is what I came up with…

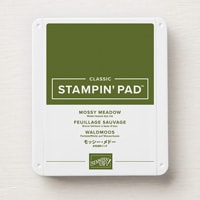
The card base is Crumb Cake cardstock cut to 4 ¼ x 11” and scored at 5 ½”.  I then cut a piece of Pecan Pie cardstock to 4 x 5 ¼” and embossed it with the Damask Designs Embossing Folder and added that to my card base.  Next, I used the third largest of the Everyday Arches and die cut it from a piece of Mossy Meadow cardstock that measured about 3 ½ x 4 ¾”.  I added that to the center of my card.  Next, I took a piece of the Beautiful Gallery DSP (I love this nature scene it is perfect for a masculine card) and cut it to 3 x 4 ½” (you can get two cards from each 6 x 6” sheet with 1 1/2” left over which I often cut to ¾” and use on the inside of the cards) and die cut it with the 4th largest of the arches from the die set and added it to the center of my Mossy Meadow arch.  For my sentiment I grabbed a scrap of Crumb Cake cardstock that measured ½ c 2 ½” and stamped “Thinking of You” from the Beautiful Motifs Stamp Set onto it with Mossy Meadow Ink.  I placed the sentiment near the left side and then cut the right at an angle before adding it to the card with Dimensionals. 

For the inside I simply added a piece of Very Vanilla cardstock that measured 4 x 5 ¼” which I left blank as this is a perfect card to send with a nice handwritten note.

I hope you enjoy this card I certainly enjoyed making it.  As always you can find the supplies to create this card and more on my website at https://www.stampinup.com?demoid=2206796 or by clicking the shopping button at the top of this blog or the link to the supplies listed below.  Be sure to follow me at: 

Facebook at:  https://www.facebook.com/craftwithronnie.stampinup.net

YouTube at: https://www.youtube.com/@ronniejohnsonstampinup

Instagram: https://www.instagram.com/craft_with_ronnie/


Happy Crafting!!!

Product List

Friday, July 18, 2025

FLORAL IMPRESSIONS ARROW CARD

Today’s card features the Floral Impressions Designer Series Paper along with the Impressions Abloom Bundle.  I am always looking for a new fun fold card to try and I saw where Lisa Curcio had made this arrow card and I decided to give it a whirl.  It was much easier than it looked. 

Here is what I came up with…


The key to this card is the folds and cuts so I am putting a scoring and cutting template below that shows how to score the card base and cut the Designer Series Paper for the front of the card as well as the Basic White cardstock for the inside of the card.  This template will be much easier for you to follow than having me try to explain it in writing. 

The card base is Strawberry Slush cardstock cut to 5 ½ x 8 ½” (see template for scoring).  I used the Floral Impressions Designer Series Paper and cut it to 4 x 5” (see template for additional cuts).  I cut the Basic White for the inside (see template) and saved the two extra pieces for other projects (including the sentiment for this card).  Once everything is cut and scored you can start to assemble.  For the folds on the card base do each side all the way before starting the other and always push your bone folder toward the tip of the arrow (this keeps it from becoming bent).  The first score line that goes from the top corner to the center bottom is folded as a mountain fold and the second score line from the 2 1/8” mark is a valley fold. 

Once the card base is prepared add the large center piece of DSP to the front of the card and the two side pieces to the sides on the inside (be sure to leave equal margins around the pieces.  I cut a piece of Strawberry Slush cardstock to 1 x 2 ¼” and a piece of Basic White cardstock for the sentiment to ¾ x 2”.  I stamped “Thanks” from the Impressions Abloom Stamp set onto the white with Strawberry Slush ink and then mounted that on the Strawberry Slush cardstock piece and attached it to the front of the card with Dimensionals.  I die cut one of the flowers from the bundle out of Blackberry Bliss cardstock and the stem and leaves from the bundle out of Garden Green and attached them (I added Dimensionals under the flower and attached the stem directly to the sentiment label.  I added a single strawberry slush colored embellishment from the Strawberry Slush & Pretty In Pink Gems. 


For the inside I stamped the sentiment “FOR BEING THERE” from the Impressions Abloom Stamp Set on the Basic White layer using Strawberry Slush Ink.  I also added one of the flowers from the Blooming Phrases stamp set (I could have used one of the ones from the Impressions Abloom but I really wanted something small) in Strawberry Slush Ink and two of the leaves from the stamp set in Garden Green. 

Here is the templates for the card base and the DSP and inside:


I hope you enjoy this card I certainly enjoyed making it.  As always you can find the supplies to create this card and more on my website at https://www.stampinup.com?demoid=2206796 or by clicking the shopping button at the top of this blog or the link to the supplies listed below.  Be sure to follow me at: 

Facebook at:  https://www.facebook.com/craftwithronnie.stampinup.net

YouTube at: https://www.youtube.com/@ronniejohnsonstampinup

Instagram: https://www.instagram.com/craft_with_ronnie/


Happy Crafting!!! 

Product List

Wednesday, July 16, 2025

BOTANICAL TEXTURES FAN FOLD

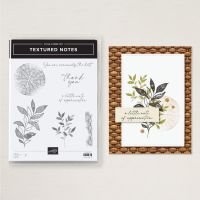
Today’s card features the Botanical Textures Designer Series Paper and the Textured Notes Stamp Set.  I saw several different examples of a fan fold card on YouTube and Pinterest and after several attempts (some more successful than others) I finally figured it out. 

Here is what I came up with…

The card base is Basic Black cardstock cut to 5 ½ x 8 ½” and scored at 4 ¼”.  I took the card base and marked the right at 2 ½” and cut diagonally from tat mark to the lower right corner (be sure to save the triangle piece you cut off as it will be used on the card later. 

DSP Design 1: Cut DSP to 4 x 5 ¼” tall, marked it at 2 ½” from the right side and cut it diagonally to the lower right corner (the triangle piece will not be used on this card but can be saved for other projects). 

DSP Design 1:  Cut DSP to 1 ¼ x 5” tall, mark and cut it diagonally from top left corner to bottom right corner and save the upper right corner triangle for the card. 

Using the same color cardstock that you used for the card base cut to 1 ½ x 5 ½” then cut diagonally from top left corner to lower right corner and save the upper right corner for the card.

DSP Design 2: Cut DSP to 2 ¼ wide by 4 ¾” tall, cut diagonally from the top left corner to the bottom right corner and save the upper right corner for the inside.

Cut Basic White cardstock to 4 x 5 ¼ and stamp one of the images from the Textured Notes Stamp Set (I used one of the foliage designs) onto the bottom left using Tuxedo Black Memento Ink.  Die cut third smallest circle from the Stylish Shapes Dies from a scrap of the Basic White.  Stamp “Thank You” from the Textured Notes Stamp set onto the circle with Tuxedo Black Memento Ink. 

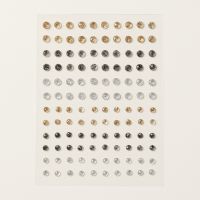
It is time to assemble the card.  Simply adhere the layers together and then with the fan pieces take the largest piece and line it up at the top with each corner aligning with the card base.  I used a light pencil mark from the other side so I would know where to put my Dimensionals (you just want them to be on the left flap).  I adhered that layer.  Now with the smaller fan layer do the same thing (it will go higher on the card (again I used that pencil line to keep my Dimensionals low enough) and adhere it to the card.  I added my sentiment circle again with Dimensionals being sure not to add them to far to the right.  For my final touch I added three of the Adhesive-Backed Sparkle Gems in black.  (NOTE: to make it easier on yourself erase pencil lines before assembly)

I was pretty happy with how this card turned out.  I did a second card using another layer of Basic White for extra interest.  I used the above DSP measurements for the Basic White layer and the DSP layers were then changed to DSP Design 1: 3 ¾ x 5” and 1 x 4 ¾” and DSP Design 2: 2 x 4 ½”.  These layers are cut the same way as described above from the top left corner to the bottom right corner saving the upper left corner for the card. 

I hope you enjoy this card I certainly enjoyed making it.  As always you can find the supplies to create this card and more on my website at https://www.stampinup.com?demoid=2206796 or by clicking the shopping button at the top of this blog or the link to the supplies listed below.  Be sure to follow me at: 

Facebook at:  https://www.facebook.com/craftwithronnie.stampinup.net

YouTube at: https://www.youtube.com/@ronniejohnsonstampinup

Instagram: https://www.instagram.com/craft_with_ronnie/


Happy Crafting!!!

Product List

Friday, May 30, 2025

BLESSED BLOOMS

Today’s card features the Beautiful Gallery Designer Series Paper yet another of the new products that was released with the new Annual Catalog on May 6th.  I made a card with this last week and promised to show another that used the scaps from the one 6 x 6” sheet of Designer Series Paper I used.  So here what I came up with…

The card base is Mossy Meadow cardstock cut to 5 ½ x 8 ½” and scored at 4 ¼”.  I cut a piece of Basic Beige cardstock to 4 x 5 ¼” and embossed it with the new Damask Designs Embossing Folder and added that to the base.  Next, I cut a piece of Mossy Meadow cardstock that measured 2 ¾ x 5 ¼” and attached it to the left side of the card base leaving about a ¼” reveal on the three sides.  Then I took my left over 3 x 5” piece of the Beautiful Gallery Designer Series Paper and attached that to the Mossy Meadow leaving a ¼” reveal on three sides.  I took the scrap of Designer Series Paper that was 1” wide that we cut off the bottom of our DSP last week and stamped the sentiment “HAVE A blessed DAY” from the Unbounded Love Stamp Set onto it with Mossy Meadow Ink and die cut it using the Stylish Shapes Dies.  I also cut a piece of the Mossy Meadow using that same die and cut it in half and adhered it to the back of the sentiment allowing about ¼” to stick out on both sides and popped it up on the card with Dimensionals.

I thought it was really awesome that I got two great cards using just one piece of 6 x 6” Designer Series Paper.  I hope this encourages you to give these kinds of things a try.  I hope you enjoy this card I certainly enjoyed making it.  As always you can find the supplies to create this card and more on my website at https://www.stampinup.com?demoid=2206796 or by clicking the shopping button at the top of this blog or the link to the supplies listed below.  Be sure to follow me at: 

Facebook at:  https://www.facebook.com/craftwithronnie.stampinup.net

YouTube at: https://www.youtube.com/@ronniejohnsonstampinup

Instagram: https://www.instagram.com/craft_with_ronnie/


Happy Crafting!!!

Friday, May 23, 2025

BIRTHDAY BLOOMS

Today’s card features the Beautiful Gallery Designer Series Paper yet another of the new products that was released with the new Annual Catalog on May 6th.  I fell in love with this paper the minute I saw it.  It just has that classic look that I love to create with. 

Here is what I came up with…

The card base is Basic Beige cardstock cut to 5 ½ x 8 ½” and scored at 4 ¼”.  I cut a piece of Mossy Meadow cardstock that measured 2 ¾ x 5 ¼” and attached it to the left side of the card base leaving about a ¼” reveal on the three sides.  Then I took my 6 x 6” Designer Series Paper and cut it down to 5” (reserve that 1” strip we will be using it later) and then cut the remainder down to 3 x 5” and attached that over the Mossy Meadow layer again leaving that ¼” reveal on the three sides.  I cut that 1” strip down to ½ x 2 ¼” and stamped my sentiment “HAPPY BIRTHDAY” onto the back side of it using Mossy Meadow Ink.  I mounted that onto a piece of Mossy Meadow cardstock that measured 5/8 x 2 3/8”.  I added a double bow attached to the back of the sentiment from the Gold Twisted Thread and popped the whole thing up on Dimensionals.

Be sure to keep those scraps because I will share another card next Friday that uses them to create a second card.  I hope you enjoy this card I certainly enjoyed making it.  As always you can find the supplies to create this card and more on my website at https://www.stampinup.com?demoid=2206796 or by clicking the shopping button at the top of this blog or the link to the supplies listed below.  Be sure to follow me at: 

Facebook at:  https://www.facebook.com/craftwithronnie.stampinup.net

YouTube at: https://www.youtube.com/@ronniejohnsonstampinup

Instagram: https://www.instagram.com/craft_with_ronnie/


Happy Crafting!!!

Friday, May 16, 2025

AHOY

Today’s card features yet another of the upcoming Online Exclusive releases the Sunrise Sailing Bundle.  This bundle will be released on May 6th and I am telling you it is super cute.  I often say I have a hard time creating masculine cards but bundles like this make it easy.

Here is what I came up with…

The card base is Misty Moonlight cardstock cut to 5 ½ x 8 ½” and scored at 4 ¼”.  I cut another layer of the Misty Moonlight cardstock to 4 x 5 ¼” and embossed it using the hybrid embossing folder that is part of the bundle.  Once it was embossed, I used my trusty Daubers and Blending Brushes to add some color.  I added Craft Stampin’ Ink to the clouds and Night of Navy Ink to the water.  I stamped a few of the seabirds from the set around the sailboat image using Tuxedo Black Memento Ink.  I added this layer directly to my card base.  Then I took a scrap of Basic White cardstock and used the die and they hybrid embossing folder to not only emboss the sail boat but to also cut it out at the same time.  I used some Stampin’ Blends (Basic Black Misty Moonlight, Pecan Pie and Azure Afternoon to color in my little sail boat and then I popped it up on the card using Dimensionals.

To finish off my card I stamped the sentiment “ahoy!” from the bundle onto a piece of Basic White cardstock that measured 7/8 x 1 ¾” and just flagged it with my paper snips.  I added a little double bow to the back of it using the Natural Tones Linen Thread (which is currently on sale as a last chance item) and then popped it up on the bottom left with Dimensionals.  The final addition was there of the Tinsel Gems 3 pack (another last chance item). 

I hope you enjoy this card I certainly enjoyed making it.  As always you can find the supplies to create this card and more on my website beginning May 6th at https://www.stampinup.com?demoid=2206796 or by clicking the shopping button at the top of this blog or the link to the supplies listed below.  Be sure to follow me at: 

Facebook at:  https://www.facebook.com/craftwithronnie.stampinup.net

YouTube at: https://www.youtube.com/@ronniejohnsonstampinup

Instagram: https://www.instagram.com/craft_with_ronnie/

Friday, May 9, 2025

SPLATTER AWAY

Today’s card features the Textured Notes Bundle along with the Woven Textures Designer Series Paper and the new Mini Corrugated 3D Embossing Folder (all of these new products will be released on May 6th and will be available on my website at that time.  I love this new bundle and believe it is great for those masculine cards which are often hard for cardmakers to create. 

Here is what I came up with…

The card base is Early Espresso cardstock cut to 5 ½ x 8 ½” and scored at 4 ¼”.  I also cut a layer of Early Espresso cardstock that measured 3 ¾ x 5” and embossed it using the Mini Corrugated 3D Embossing Folder.  Once that was embossed I took some White Craft Ink Re-filler and added a few drops onto one of my acrylic blocks and missed just a small amount of water into it to make it more liquid.  I picked that ink up with a blending brush and just tapped the brush against the side of my bonefolder splashing the white ink all over the image.  I was very happy with the distressed image it created.  I adhered this piece to the center of my card.

To decorate the card I cut a piece of the Woven Textures Designer Series Paper to 2 x 3 ½” and added it near the bottom left.  I stamped image #2 (see below) onto a scrap of Basic White cardstock using Pecan Pie Ink and fussy cut it out.  I stamped image #1 onto a scrap of Basic White cardstock using Crumb Cake Ink and fussy cut it out.  I added image #1 and they layered image #2 over the top of it.  I stamped my sentiment “a little note of appreciation” in Early Espresso Ink onto a scrap of Basic White cardstock and die cut it out using die #1 from the bundle and popped it up with Dimensionals

To finish off the card I added a couple little Adhesive-Backed Swirl Dots and a double bow made from linen thread attached with a Mini Glue Dots.  I am really enjoying this new set and I am sure you will as well.


I hope you enjoy this card I certainly enjoyed making it.  As always you can find the supplies to create this card and more on my website at https://www.stampinup.com?demoid=2206796 (beginning May 6th) or by clicking the shopping button at the top of this blog or the link to the supplies listed below.  Be sure to follow me at: 

Facebook at:  https://www.facebook.com/craftwithronnie.stampinup.net

YouTube at: https://www.youtube.com/@ronniejohnsonstampinup

Instagram: https://www.instagram.com/craft_with_ronnie/


Happy Crafting!!!


Friday, May 2, 2025

IMPRESSIONS ABLOOM APPRECIATION

Today’s card features the Impressions Abloom Bundle and Florals In Bloom Designer Series Paper which are part of the new Online Exclusives releasing on May 6th.  What does that mean?  That while these products are not featured within any of the current catalogs it can be ordered just like any other product once they are released.  I have always loved flowers so this set was a natural for me.

Here is what I made using it…

The card base is Secret Sea cardstock (this is one of the new 2025 – 2027 In Colors that will be released with the new Annual Catalog in June) cut to 5 ½ x 8 ½” and scored at 4 ¼”.  I then took a piece of Secret Sea cardstock cut to 4 x 5 ¼” and Die cut the center using dies #1 and #2 (see below) from the Impressions Abloom Dies.  I simply placed them in the center of the piece and die cut them.  The cut piece from die #1 was set aside to be used on another project.  I then took this piece of cardstock and embossed it with the Damask Designs Embossing Folder (another new product from the upcoming annual catalog).  I added a 3 ½ x 4 ½” piece of the Florals In Blooms Designer Series Paper behind the cut-out center and then added the die cut from die #2 over the edges of it.  I popped this whole layer up onto the center of my card base using Dimensionals.

Now it was onto the flowers.  I cut layered image #4 and #5 together, images #3 and #6 together and #7 and #8 together (I used a little piece of scotch tape to center them inside one another) and die cut them out of scraps of Strawberry Slush cardstock (another of the new 2025 – 2027 In-Colors being released in June) I inked up the center with a little Strawberry Slush Ink using a Dauber.  I layered die cut image #13A and #13B and #14A and #14B (x2) the same way as I did the flowers and die cut them out of scraps of Darling Duckling (another of the new 2025 – 2027 In-Colors) I inked them with Darling Duckling Ink using a dauber and then mounted those onto the center of the flowers.

I die cut image #20 out of scraps of Darling Duckling cardstock and image #21 out of a scrap of Timid Tiger (yet another of the new 2025 – 2027 In-Colors).  I die cut image #17 (x2) and dies #11 and #12 out of Granny Apple Green cardstock scraps and inked them with Granny Apple Green Ink and a dauber.  I used my bonefolder to give my flowers and leaves a little dimension before adding them to my card.  Some are adhered directly to the card while other are popped up with Dimensionals.  With everything in place, I grabbed a scrap of Basic White cardstock and stamped my sentiment “I appreciate you” onto it using Strawberry Slush Ink.  I simply fussy cut around the sentiment and added it to my card front.  The addition of some Iridescent Pearls Basic Jewels where the finishing touch.

I hope you enjoy this card I certainly enjoyed making it.  As always you can find the supplies to create this card and more on my website at https://www.stampinup.com?demoid=2206796 or by clicking the shopping button at the top of this blog or the link to the supplies listed below.  While I can not create a direct link to the some of the new 2025 - 2027 In-Color cardstock and Inks or the Impressions Abloom Bundle and Florals In Bloom Designer Series Paper they will be available to purchase come May 6th from my website at:  https://www.stampinup.com?demoid=2206796

Be sure to follow me at: 

Facebook at:  https://www.facebook.com/craftwithronnie.stampinup.net

YouTube at: https://www.youtube.com/@ronniejohnsonstampinup

Instagram: https://www.instagram.com/craft_with_ronnie/


Happy Crafting!!!